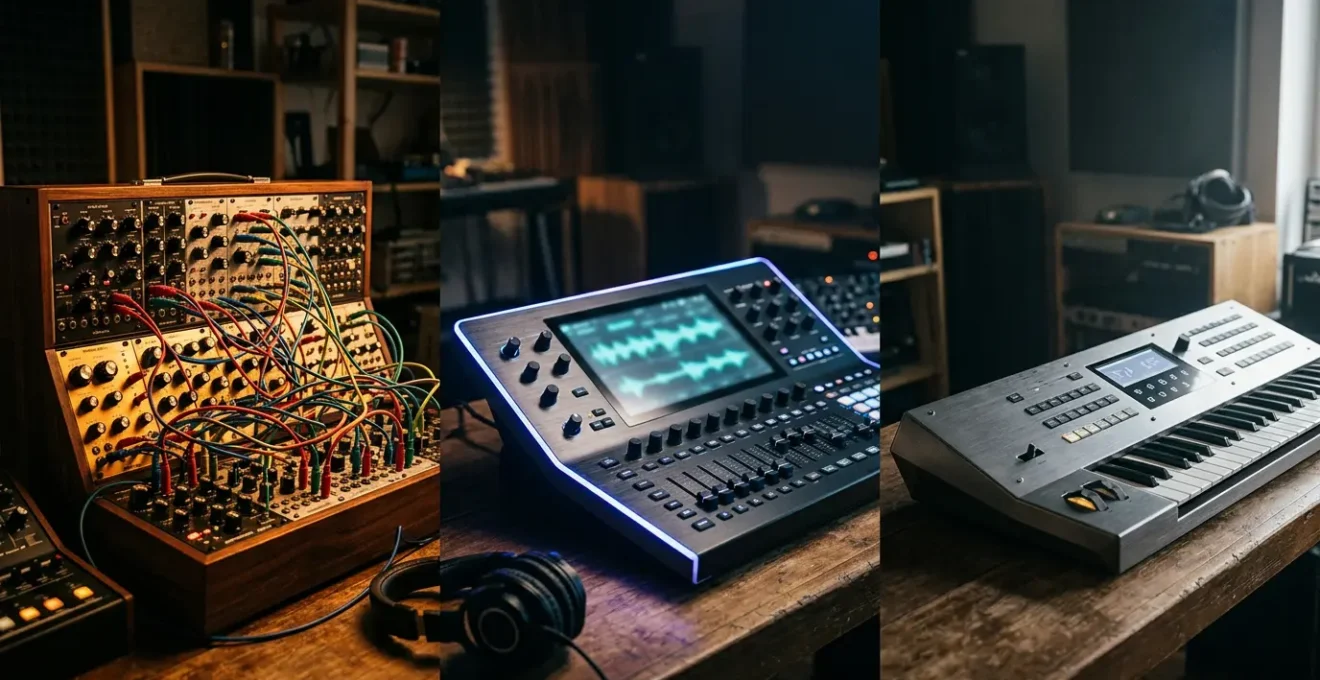
Choosing your first synthesizer is less about its sound and more about the creative workflow it inspires.
- Analog & Virtual Analog (VA) synths encourage a hands-on, sculptural approach to sound design, perfect for intuitive exploration.
- Wavetable & FM synths offer a more architectural, complex process, ideal for creating intricate, evolving textures from the ground up.
Recommendation: Start with a simple subtractive synth (analog or VA) to master the fundamentals of sound design before exploring more complex architectures.
Entering the world of synthesizers can feel like learning a new language. You’re bombarded with terms like « analog warmth, » « digital clarity, » and « FM complexity, » but what do they really mean for you, the aspiring musician? The common advice focuses on the sonic character of each type—analog is fat, digital is clean, FM is metallic. While true to an extent, this misses the most critical point. The real difference lies not just in the final sound, but in the entire creative journey each synthesis type encourages.
This isn’t just about comparing oscillators and filters. It’s about understanding the distinct workflow philosophy behind each instrument. An analog synth invites you to sculpt sound like clay, with every knob turn providing immediate tactile feedback. A digital wavetable synth feels more like architecture, letting you build and morph complex structures. FM synthesis is like mathematical sculpture, creating rich harmonics through precise relationships. Forget the vintage vs. modern debate for a moment. The most important question is: which way of thinking and creating resonates most with you?
This guide will demystify the core synthesis types by focusing on the creative experience they offer. We’ll explore why virtual analog plugins can be indistinguishable from hardware, what gives FM its unique character, and how to start designing your own sounds from scratch. By the end, you won’t just know the difference between a Moog and a Yamaha DX7; you’ll understand which creative path is the right one for your musical journey.
To help you navigate these concepts, this article breaks down each major type of synthesis, focusing on the practical « why » behind the sound and the workflow. Explore the sections below to find the approach that best fits your creative style.
Summary: A Beginner’s Guide to Synthesizer Workflows
- Is It Real? Why Virtual Analog Plugins Sound Just as Good Today
- Carriers and Modulators: Why FM Sounds Metallic and Glassy
- Morphing Sounds: Why Wavetables Are the Future of EDM Bass
- Eurorack Addiction: Why Wires and Blinking Lights Are So Expensive
- Monophonic Lead: Why You Can’t Play Chords on a Moog Model D
- Oscillators and Filters: Sculpting a Bass Sound in 3 Steps
- Why Logic’s Compressor Might Be All You Need
- How to design your own sounds instead of relying on presets?
Is It Real? Why Virtual Analog Plugins Sound Just as Good Today
The eternal debate in the synth community is analog hardware versus digital software. Purists claim that only true analog circuits can deliver « warmth » and « life, » while pragmatists argue that modern plugins are indistinguishable. The truth, especially for a beginner, is that the line has become incredibly blurry. High-quality Virtual Analog (VA) plugins now use sophisticated modeling to replicate the behavior of analog components, including their subtle imperfections and non-linearities—the very things that create that coveted « analog » character.
This isn’t just marketing hype; it’s backed by listener experience. The focus shouldn’t be on chasing an abstract ideal of « real analog, » but on the practical workflow. A VA plugin offers the same subtractive synthesis signal path—oscillator into filter into amplifier—but with the modern conveniences of preset storage, total recall within your DAW, and complex automation. This workflow philosophy allows for a blend of classic sound-shaping with digital precision. For someone learning synthesis, this is a massive advantage, as it removes barriers and encourages experimentation without a hefty price tag.
The sonic architecture is the same, but the accessibility is worlds apart. Rather than getting caught up in a blind test, consider the practical benefits. Do you want the satisfaction of turning physical knobs, or the flexibility of designing sounds entirely within your computer? For many modern producers, the answer is clear.
Case Study: The Minimoog Virtual Analog Blind Test
To put the « analog vs. digital » debate to the test, electronic music student Lorenzo Furlanetto conducted a blind test comparing an original hardware Minimoog with two top-tier software emulations: Arturia’s Minimoog V and Synapse Audio’s The Legend. He created patches on all three and placed them within full musical productions. When asked to identify the hardware synth, participants struggled significantly, demonstrating that in the context of a mix, high-quality VA plugins are virtually indistinguishable from their legendary hardware counterparts.
Ultimately, the discussion around virtual analog is a perfect example of where sound quality has become a secondary concern to creative workflow. When even trained ears can’t tell the difference in a mix, the choice becomes about how you prefer to create.
Carriers and Modulators: Why FM Sounds Metallic and Glassy
If subtractive synthesis is like sculpting with a chisel, Frequency Modulation (FM) synthesis is like forging metal in a foundry. Instead of starting with a harmonically rich wave and carving parts away, FM builds complex timbres by having oscillators (called operators) modulate each other’s frequency. This process generates a vast spectrum of new harmonics, often creating sounds that are impossible to achieve with analog-style synthesis. The core of the FM workflow is the relationship between a « carrier » operator, which produces the audible sound, and a « modulator » operator, which alters the carrier’s pitch at an audio rate.
The iconic « metallic » and « glassy » character of FM comes from the mathematical relationship between the carrier and modulator frequencies. As Wikipedia contributors explain in their article on the topic, the nature of these sounds depends entirely on this relationship.
FM synthesis can create both harmonic and inharmonic sounds. To synthesize harmonic sounds, the modulating signal must have a harmonic relationship to the original carrier signal.
– Wikipedia Contributors, Frequency Modulation Synthesis – Wikipedia
When the frequencies are in simple integer ratios (e.g., 2:1, 3:1), the result is harmonic and musical, like an electric piano. When the ratios are non-integers, the sound becomes inharmonic and complex, leading to bell-like, metallic, or percussive textures. This is the heart of the FM sound-shaping journey—it’s less about intuitive tweaking and more about architectural design, adjusting ratios and algorithms to construct a sound from its core DNA.

This visualization captures the essence of FM. The intersecting metallic planes represent how different operator ratios reflect and combine to create a final, complex timbre. The workflow is more analytical, rewarding those who enjoy experimenting with numbers and algorithms to discover entirely new sonic territories. It’s a world away from simply turning a filter knob.
Morphing Sounds: Why Wavetables Are the Future of EDM Bass
Wavetable synthesis offers a powerful hybrid workflow, combining the architectural depth of digital sound design with the immediate, sweepable feel of subtractive synthesis. Instead of a single, static waveform like a sawtooth or square wave, a wavetable synthesizer uses a « wavetable »—a collection of single-cycle waveforms arranged in a sequence. The magic happens when you modulate the position within this table, creating sounds that can morph and evolve dramatically over time. This is why it has become the go-to tool for modern electronic music, especially for complex, moving basslines.
Think of it as a flip-book of sounds. A simple LFO can animate the wavetable position, transitioning from a soft sine wave to an aggressive, jagged waveform, all within a single note. This capability for fluid, dynamic timbre shifting is central to the « growls » and « wubs » of genres like Dubstep and Drum & Bass. The workflow philosophy is one of motion; sounds are rarely static. This has fueled its massive growth, with the software synthesizer market, where wavetable synths dominate, poised for huge expansion. In fact, a comprehensive 2024 market forecast projects the market to reach USD 3.5 billion by 2032.
This sonic architecture allows producers to create incredibly detailed and animated sounds that would be painstaking to achieve with other methods. For anyone producing modern electronic music, mastering wavetable synthesis is no longer optional; it’s essential. Here are some of the most influential wavetable synths used today:
- Serum: The industry-standard for its visual workflow, allowing you to see exactly how you are manipulating the wavetable.
- Vital: A groundbreaking free synthesizer known for its spectral warping capabilities and advanced visual feedback.
- Massive X: The next generation of a legendary synth, offering a vast array of wavetables and deep modulation options.
- ANA 2: Features full wavetable synthesis with an innovative system for designing your own custom wavetables.
The rise of these tools shows a clear shift in production. The ability to create dynamic, evolving soundscapes is paramount, and wavetable synthesis provides the most direct and powerful workflow to achieve it.
Eurorack Addiction: Why Wires and Blinking Lights Are So Expensive
Enter the world of Eurorack modular synthesis, and you’re entering a realm of infinite possibility and, notoriously, significant expense. Unlike a self-contained synthesizer, a modular system is an open-ended ecosystem of individual modules—oscillators, filters, sequencers, etc.—that you connect with patch cables. This is the ultimate expression of the « sound-shaping journey » as a physical act. There are no presets; every sound is built from scratch by physically routing signals. This creates a powerful form of creative friction, where happy accidents and unexpected connections lead to sounds you’d never design intentionally.
But why the high cost? It’s not just the technology; it’s the economics of small-batch manufacturing. Most Eurorack modules are designed and built by small, passionate teams, not mass-produced in giant factories. This boutique approach involves specialized components, extensive research and development, and a multi-layered distribution system. The price you pay covers far more than just the parts in the box.
Case Study: The Real Cost of a Eurorack Module
In an analysis for Attack Magazine, Robin Vincent of Molten Modular broke down the costs of a simple module, the Motion Meter, which retailed for £130. After removing 20% VAT, the price dropped to £104. Retailers typically require a 30% margin, meaning they buy the module for about £75. This reveals that nearly half the retail price goes to the distribution channel before even accounting for the costs of parts, manufacturing, R&D, and labor. This small-scale economy is a primary driver of the premium pricing in the Eurorack world.
The tactile feedback of plugging in a cable and hearing an immediate sonic change is addictive. It transforms sound design from an intellectual exercise into a physical performance. While the initial investment is high, these modules often retain their value well over time. For many, the unique, hands-on workflow and the potential for sonic discovery are well worth the price of admission.
Monophonic Lead: Why You Can’t Play Chords on a Moog Model D
One of the first points of confusion for beginners is the concept of monophonic versus polyphonic synthesizers. When you see a legendary synth like the Moog Model D, known for some of the most iconic bass and lead lines in history, you might be surprised to learn it can only play one note at a time. This isn’t a flaw; it’s a fundamental part of its sonic architecture. A monophonic synth has a single voice, meaning one complete signal path from oscillator to filter to amplifier. When you press a new key, it simply tells that one voice to change its pitch.
In contrast, a polyphonic synth has multiple voices (typically 4, 8, 16, or more), allowing you to play chords. The workflow philosophy of a monophonic synth is entirely different. It forces you to think melodically. It excels at powerful, articulate basslines, searing lead solos, and intricate sequences where the focus is on the character and movement of a single melodic line. The limitation of playing only one note at a time is, paradoxically, its greatest strength. It encourages a different kind of creativity, focused on melody, rhythm, and articulation rather than harmonic pads.
However, being limited to one note doesn’t mean you can’t create harmonic richness. Producers have developed many techniques over the years to imply harmony and create a fuller sound from a single voice. According to a beginner’s guide from iZotope, you can use several tricks:
- Fast Arpeggios: Programming rapid note sequences to create the illusion of a chord.
- Strategic Delay/Reverb: Using time-based effects to create harmonic layers and fill sonic space.
- Overdubbing: Recording multiple monophonic takes on different tracks to build chords layer by layer.
- Octave Doubling: Using a sub-oscillator to automatically add a lower octave, creating implied harmonic depth.
Understanding this distinction is crucial. If your goal is to play lush pads and complex chords, a monophonic synth is the wrong tool. But if you want to craft unforgettable melodies and basslines with immense character, its focused workflow is unmatched.
Oscillators and Filters: Sculpting a Bass Sound in 3 Steps
The most common and intuitive form of synthesis is subtractive synthesis, the foundation of virtually all analog and virtual analog synths. The workflow is best described as sculpture. You start with a block of raw, harmonically rich material—the sound from an oscillator—and carve away frequencies with a filter to shape it into its final form. This direct, hands-on process is why it’s the perfect starting point for learning sound design.
As the experts at iZotope describe it, this process is an electronic mimicry of how acoustic sounds are produced. An electrical signal replaces a vibrating string, but the principle is the same.
A synth mimics this process, but instead of a vibrating guitar string or vocal chord, the vibration comes from an electrical signal that can be sped up, slowed down, and modified in ways that natural acoustic sounds cannot.
– iZotope, The Beginner’s Guide to Synths for Music Production
Designing a classic bass sound is a perfect exercise in this sculptural workflow. Here’s the process in three basic steps:
- Choose Your Raw Material (Oscillators): Start by selecting one or two oscillators. A sawtooth wave is full of bright, buzzy harmonics, making it a great starting point. A square wave has a hollower, more focused sound. Mixing them together gives you a complex and rich foundation.
- Sculpt with the Filter (Cutoff & Resonance): This is where the magic happens. Use a low-pass filter to « subtract » the high frequencies. Lowering the filter cutoff knob makes the sound darker and rounder, placing it firmly in the bass register. Adding a bit of resonance emphasizes the frequencies right at the cutoff point, giving the sound more « bite » and character.
- Shape the Volume (Amplifier Envelope): Finally, use the amplifier envelope (ADSR) to define the sound’s volume over time. For a punchy bass, you’ll want a fast attack, a medium decay, and a low sustain. This creates a sharp, percussive start to the note that fades quickly, leaving room in the mix.
This three-stage journey—from raw waveform, through the filter, to the final shaped sound—is the heart of the subtractive workflow. By mastering these three simple steps, you can create a huge variety of sounds.
Why Logic’s Compressor Might Be All You Need
As you delve deeper into sound design, you’ll realize that synthesis is only half the battle. Processing your synth sounds with effects is what truly brings them to life and makes them sit properly in a mix. While there’s a universe of expensive third-party plugins, the stock compressor included in your Digital Audio Workstation (DAW), like the one in Logic Pro, is an incredibly powerful and versatile tool that is often overlooked. Before you spend a dollar, it’s essential to master the tool you already own.
A compressor’s primary job is to control dynamics—making loud parts quieter and quiet parts louder—but its creative applications for synthesizers are vast. It can add punch, tame harshness, create space in a mix, and glue different synth layers together. The stock compressor in Logic Pro is particularly flexible because it includes models of several legendary hardware compressors (FET, Opto, VCA), each with its own unique character. This means you have a whole suite of different compression « flavors » in a single, free plugin.
The workflow here is about enhancement and problem-solving. It’s about taking a raw synth patch and giving it the professional polish it needs to work in a song. Instead of chasing the « next best plugin, » a more effective workflow is to deeply learn the one you have. Here are four essential techniques you can apply to your synth tracks using just a stock compressor:
- Taming Wild Resonance: Use moderate compression with a medium attack to control unpredictable volume spikes during an analog-style filter sweep, keeping the sound exciting without clipping.
- Adding Punch to FM Patches: Apply fast attack and release settings with a FET-style circuit to emphasize the sharp, percussive transients of FM sounds, helping them cut through a dense mix.
- Parallel « New York » Compression: Use the compressor’s Mix knob to blend a heavily compressed version of your synth with the original dry signal. This adds body and sustain without sacrificing the initial punch.
- Sidechain Ducking for Mix Clarity: Route a kick drum or vocal track to the compressor’s sidechain input on a synth pad track. This makes the pad automatically « duck » in volume whenever the kick or vocal is present, creating rhythmic space and clarity.
Mastering these four techniques will take you incredibly far. The lesson is clear: a deep understanding of a basic tool is far more powerful than a superficial knowledge of many expensive ones.
Key Takeaways
- The best synth for you depends on the creative workflow it inspires, not just its « warm » or « cold » sound.
- Subtractive synthesis (Analog/VA) is a sculptural process, ideal for intuitive, hands-on sound design.
- Wavetable and FM synthesis are architectural processes, perfect for building complex, evolving sounds from the ground up.
How to design your own sounds instead of relying on presets?
Relying on presets is a common starting point for any producer, but the real creative fulfillment comes from designing sounds that are uniquely yours. Moving beyond presets can seem daunting, but it’s a skill that can be learned with a methodical approach. The key isn’t to randomly twist knobs, but to engage in intentional design—understanding the function of each parameter and how they interact. The goal is to train your ear to connect the sounds you imagine in your head with the controls on the synthesizer in front of you.
The most effective workflow is to break the learning process down into manageable steps. Instead of trying to master a complex synthesizer all at once, focus on one simple synth and deconstruct how its sounds are made. This process of reverse-engineering is one of the fastest ways to build intuition and muscle memory.
This is the core philosophy behind dedicated training tools, which focus on building a deep, transferable understanding of synthesis from the ground up.
Syntorial trains your ear to recognize how each control shapes and manipulates sound. You’ll be able to take the sounds you hear and re-create them on any subtractive or wavetable synthesizer on the market.
– Syntorial, Syntorial: The Ultimate Synthesizer Course
To start on this path, you need a clear plan of action. The following checklist provides a structured method for auditing any preset, breaking it down to understand its fundamental components. This process will demystify sound design and empower you to start creating from scratch.
Action Plan: Auditing a Preset to Learn Sound Design
- Isolate the Core: Load a preset you like and immediately disable all built-in effects (reverb, delay, chorus, etc.). This reveals the raw, unprocessed sound so you can analyze its true character.
- Deconstruct the Source: Solo each oscillator one by one. Ask yourself: What waveform is it using (saw, square, sine)? What is its octave or pitch? How are the oscillators mixed together?
- Analyze the Filter: Examine the filter section. Is it a low-pass, high-pass, or band-pass filter? Where is the cutoff frequency set? How much resonance is being used? Try sweeping the cutoff manually to hear its effect.
- Trace the Modulation: Identify the key modulation routings. Is an LFO modulating the filter cutoff for a « wobble » effect? Is the filter envelope creating a « pluck » or a slow sweep? Is an LFO adding vibrato to the pitch? Disable and re-enable them to understand their contribution.
- Rebuild from Scratch: After your analysis, open a new, blank « init » patch. Using your notes, try to recreate the preset from memory. This final step solidifies your understanding and is the most crucial part of the learning process.
By understanding the different workflow philosophies and committing to intentional practice, you can transform the synthesizer from a confusing machine into a powerful extension of your musical creativity. Start with the fundamentals, learn to deconstruct the sounds you love, and you’ll soon be crafting a sonic signature that is entirely your own.