
In summary:
- True sound design is about intentional experimentation, not just knowing theory or tweaking presets.
- Start with fundamental building blocks like oscillators and filters to sculpt basic tones before adding complexity.
- Embrace sonic alchemy by blending digital precision with organic textures like foley and samples for unique, living sounds.
- Use modulation (LFOs, envelopes) not just as effects, but as the soul of your patch, giving it movement and life.
- Ditching presets is the first step to moving from a synth operator to a sound sculptor with a true signature sound.
The endless scroll through preset banks is a familiar ritual for electronic musicians. You’re searching for « that sound »—the one that sparks an entire track. But more often than not, you settle for something close, something someone else designed. This process leaves you feeling more like a curator than a creator. The common advice is to learn the basics: oscillators, filters, ADSR. While essential, this technical knowledge often misses the spark of creativity. It teaches you the « what, » but not the « why » or the « what if. »
What if the frustration isn’t a lack of the right presets, but a barrier to your own unique voice? The real key to a signature sound doesn’t lie in another expansion pack. It lies in a shift in mindset: from searching for sounds to building them. It’s about embracing your synthesizer not as a library of static options, but as an experimental playground for sonic alchemy. This is where you learn to blend the clean precision of digital synthesis with the beautiful unpredictability of organic chaos.
This guide isn’t another dry textbook on synthesis. It’s an empowering manifesto for the aspiring sound sculptor. We will deconstruct the process, moving from the foundational atoms of sound to the complex, breathing organisms they can become. We’ll explore how to sculpt a powerful bass, blend foley with saw waves, inject life into static pads, and understand the profound difference between tweaking a macro and true, from-the-ground-up sound design. It’s time to stop borrowing sounds and start forging your own.
This article provides a complete roadmap, from the fundamental building blocks of sound to advanced creative techniques. To help you navigate this journey, the summary below outlines the key stages we will explore in detail.
Summary: From Basic Waveforms to a Signature Sound
- Oscillators and Filters: Sculpting a Bass Sound in 3 Steps
- Organic meets Digital: Blending foley with Saw Waves
- Making it Move: Adding Life to Static Pads with Modulation
- Why Changing One Macro Knob Is Not Sound Design
- How to Recreate That Famous 80s Lead Synth by Ear
- Is It Real? Why Virtual Analog Plugins Sound Just as Good Today
- Micro-Sampling: Turning a Vocal Chop into a lush Pad
- Demystifying synthesizers: Analog vs Digital vs FM for beginners
Oscillators and Filters: Sculpting a Bass Sound in 3 Steps
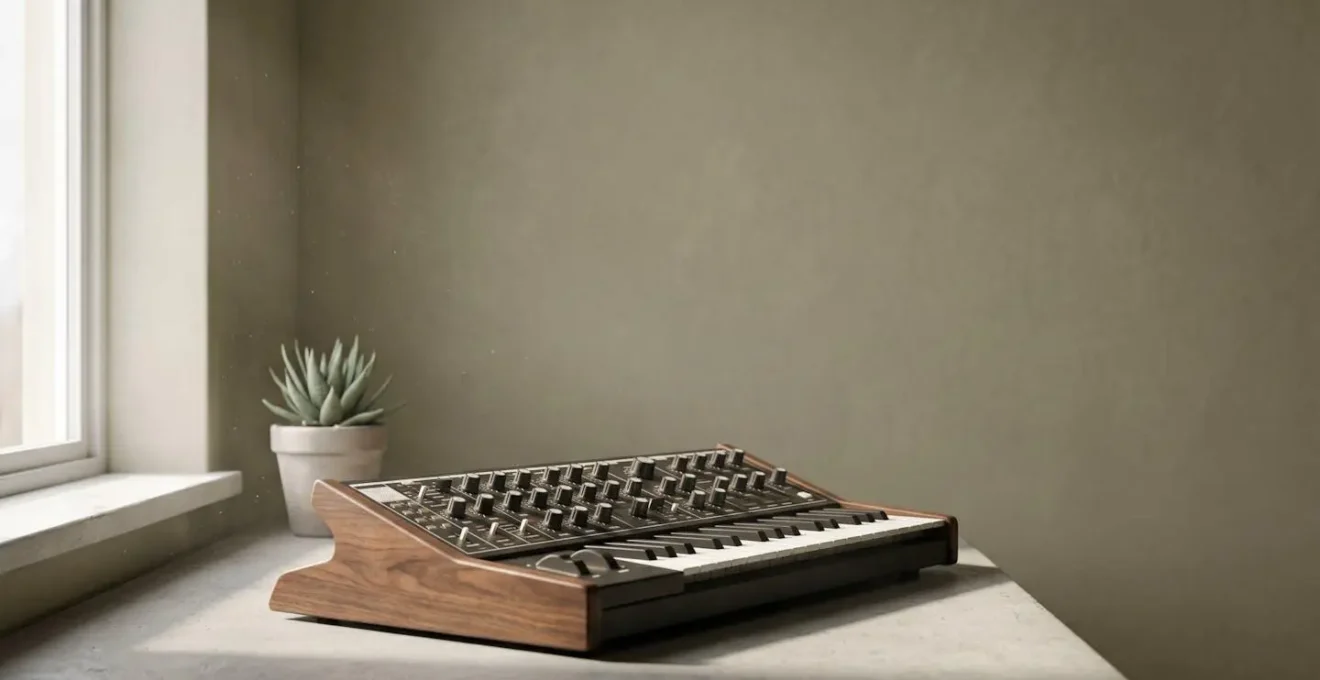
The journey into sound design begins with the most fundamental relationship in subtractive synthesis: the oscillator and the filter. Think of the oscillator as your raw block of marble—a harmonically rich waveform like a sawtooth or square wave. The filter is your chisel, carving away frequencies to reveal the shape within. A powerful, mix-ready bass isn’t about finding the « biggest » preset; it’s about intentionally sculpting harmonic content. You want a sound with a solid, mono-compatible sub-bass foundation, but also with enough midrange character to be heard on smaller speakers. This is achieved not with complex layers at first, but with a simple, focused workflow.
The secret is to generate harmonics and then control them dynamically. Starting with a pure sine wave gives you sub, but it won’t cut through a mix. Instead, you can start with a simple waveform and use filter drive or saturation to create overtones. Then, by applying an envelope to the filter, you can shape the sound over time—a quick, bright transient that punches through the kick drum, followed by a sustained, deep sub-bass tail. This creates a sound that is both impactful and clean, occupying its own space without muddying the low end. It’s the first step in sonic alchemy: turning a simple wave into a functional, dynamic musical element.

This hands-on process of shaping the core tone is where your unique sound begins to emerge. Below is a simple, three-step workflow to get you started on sculpting a dynamic bass patch from scratch, moving beyond static, one-dimensional presets.
Your Action Plan: Three-Step Bass Design
- Start with a sine wave and introduce filter drive to create harmonic content that cuts through the mix without overpowering sub frequencies.
- Assign a downward ramped envelope to filter drive and cutoff so the initial portion contains more harmonic frequencies while the sustained portion remains subby.
- Use independent processing for sub and mid-bass layers – apply high-pass filtering to upper frequencies while keeping sub frequencies centered and mono-compatible.
This foundational skill—understanding how to generate and then tame harmonics—is the gateway to creating virtually any sound you can imagine.
Organic meets Digital: Blending foley with Saw Waves
Purely digital or analog tones can sometimes feel sterile. The real magic, the secret sauce to a truly unique and professional sound, often lies in layering. This is where our concept of sonic alchemy truly comes to life. By blending the perfect, stable world of synthesized waveforms with the imperfect, textured world of organic recordings (foley), you create a hybrid sound that has both power and personality. Imagine a sharp, powerful synth lead. Now, imagine layering it with the subtle, short-lived scrape of a guitar pick on a string or the crackle of a vinyl record. Suddenly, the sound has a new dimension—a tactile, physical quality that draws the listener in.
This technique is not about masking the synth but enhancing it. The organic element, often used subtly, can provide a unique transient, a lingering textural tail, or a layer of noise that fills in the gaps between the clean harmonics of the synth. You could use the sound of a closing car door to add punch to a snare, or the rustle of leaves to add an airy, evolving quality to a pad. The key is to see sound not as « synthetic » or « real, » but as a spectrum of textures to be combined in your experimental playground. It’s about creating a sound that feels alive, breathing, and tangible.
This hybrid approach is a cornerstone of modern electronic music production. For example, a common technique for creating a full and rich bass sound involves this exact type of layering, proving its effectiveness in a professional context.
Case Study: Layering for a Full Bass Sound
Audio engineers have documented a powerful hybrid layering approach where a clean, unwavering sine wave handles the sub-bass duties, remaining pure and centered in the mix. Meanwhile, separate layers of saw or square waves are heavily processed with saturation and distortion to create a rich, harmonically complex midrange. This technique, discussed by producers on platforms like Gearspace, allows for a perfectly consistent and powerful low end from the sine wave, while the distorted top layers provide the aggressive character and audibility on smaller playback systems. This separates the « weight » from the « character, » allowing independent control over both.
By thinking like a chef combining ingredients, you can start to build a library of sounds that are not just synthesized, but truly designed.
Making it Move: Adding Life to Static Pads with Modulation
A sound without movement is a dead sound. This is especially true for pads, which are meant to create atmosphere, tension, and emotion over time. A static pad, holding one chord, can quickly become boring. The antidote to this sonic stagnation is modulation. Modulation is simply using one signal to change, or « control, » a parameter of another. The most common tool for this is the Low-Frequency Oscillator, or LFO. An LFO creates a waveform that cycles too slowly to be heard as a pitch, but is perfect for creating rhythmic pulses, gentle swells, and evolving changes in your sound.
True mastery of modulation comes from breaking away from simple, synchronized patterns. Instead of using one LFO to control the filter cutoff, try using three. Assign the first, a slow sine wave, to gently pan the sound. Assign the second, a slightly faster triangle wave, to subtly modulate the pitch of one oscillator for a classic analog-style drift. Assign the third, a random « sample and hold » wave, to slightly alter the decay time of the filter envelope. Now, instead of a sound that just predictably opens and closes, you have a sound that drifts, wanders, and breathes with a sense of organic chaos. As synthesis fundamentals show, LFOs typically operate at frequencies below 20 Hz, making them ideal for these subsonic control signals.
The goal is to create movement that feels non-repetitive and natural. By using multiple LFOs at different, non-syncopated rates, you create complex, overlapping cycles that can take a very long time to repeat, giving the illusion of a truly living soundscape. This is how you transform a simple chord into an evolving, captivating atmosphere that holds the listener’s attention.
Here’s a strategy for using multiple LFOs to bring your static pads to life:
- Use multiple LFOs at different rates to modulate independent parameters – one LFO for filter cutoff, another for oscillator level, ensuring they don’t sync to create organic, non-repetitive movement.
- Set modulation levels carefully – small values create subtle deviations while large values produce dramatic changes; often a little goes a long way for musical results.
- Apply sine waves for subtle, smooth parameter movement and explore other shapes like square waves for pronounced on/off states or rhythmic effects.
- Automate modulation parameters over time – sweep through source samples, modulate grain size, or adjust LFO speeds to create evolving textures across song sections.
This subtle, constant motion is what separates a student’s patch from a professional sound designer’s work. It’s the soul in the machine.
Why Changing One Macro Knob Is Not Sound Design
In the world of modern soft synths, macro knobs are everywhere. They offer a tempting promise: twist this one knob, and the sound will transform in a cool and dramatic way. A macro might simultaneously open a filter, add distortion, and increase reverb. While this is a fantastic tool for performance and a quick way to add variation, it’s crucial to understand what it is and what it isn’t. Tweaking a macro is like choosing a filter on Instagram; true sound design is like learning photography, understanding aperture, shutter speed, and composition. The macro is the result of a sound design process, not the process itself.
Relying solely on macros keeps you on the surface, forever using a sonic palette someone else has curated for you. The real power, the ability to create sounds that are truly *yours*, comes from getting your hands dirty with the fundamental parameters that the macro is controlling. It’s about understanding how an oscillator’s waveform choice affects the filter’s behavior. It’s about knowing why a fast attack on an amp envelope creates a pluck, while a slow one creates a swell. As the experts at FabFilter note, this foundational knowledge is a shortcut, not a long-cut.
Understanding the parameters on your synths can help you to make the sounds that you’re searching for a lot quicker.
– FabFilter, FabFilter Learn – Synthesis and Sound Design
Building your own sound means building your own macros, not just using them. It means deciding for yourself that you want the filter cutoff to be linked to the LFO rate, or the distortion amount to be tied to the velocity of your key press. This is where your unique creative decisions create a signature sound. To get there, you must first master the building blocks.
Checklist: Building Your Foundational Skills
- Understand the four basic waveforms (sine, triangle, square, sawtooth) and their harmonic characteristics before attempting complex patches.
- Learn ADSR envelope fundamentals: Attack (rise time), Decay (initial fall), Sustain (held level), and Release (fade-out).
- Practice with a simple subtractive synthesizer to understand the signal flow: Oscillator -> Filter -> Amplifier.
- Experiment with every parameter to internalize its effect; hands-on exploration is the most critical skill.
- Start building your own simple macros: assign one knob to control two parameters (e.g., filter cutoff and resonance) to understand the relationships.
Once you understand the ingredients, you can write your own recipes instead of just ordering from a menu.
How to Recreate That Famous 80s Lead Synth by Ear
One of the best ways to train your sound design muscles is to try and recreate a sound you love. The synth-pop sounds of the 1980s are a perfect training ground. They are often less complex than modern patches, built on clear principles of subtractive synthesis, yet are incredibly iconic. Think of the brassy leads from « Take On Me » or the punchy bass from « Blue Monday. » When you try to recreate these sounds by ear, you’re not just copying; you are engaging in a deep listening exercise. You start to ask critical questions: Is that a square wave or a sawtooth? Is the filter wide open or slightly closed? Is there a fast attack on the envelope, or is it a little softer? Is there a subtle, fast vibrato (an LFO modulating pitch)?
This process demystifies sound design. It turns abstract concepts into concrete sonic goals. You’ll quickly learn to identify the « footprint » of different waveforms and filter settings. You might notice, for example, that many 80s lead sounds use two slightly detuned sawtooth oscillators to create a thick, chorusing effect. You’ll discover the power of a quick filter envelope « blip » to create those classic synth-brass stabs. This is active learning, and every attempt, successful or not, builds your intuitive understanding of how parameters translate into sound. This is your experimental playground in action.
Many of these iconic sounds were born from the new wave of synthesizers that hit the market in the 80s, like the revolutionary Yamaha DX7. While its FM synthesis was notoriously difficult to program from scratch, its presets became the sound of the decade, fundamentally changing the sonic landscape and offering a new palette that defined an era. When Yamaha released the DX7 in 1983, its impact was immediate, offering a versatile range of sounds from basses to bells that, as documented by industry retrospectives, found instant appeal with studios and musicians in popular music.
This reverse-engineering approach is one of the fastest ways to connect the theory of synthesis to the practice of making music.
Is It Real? Why Virtual Analog Plugins Sound Just as Good Today
The age-old debate: analog versus digital. For years, the consensus was that analog synths possessed a « warmth » and « life » that digital plugins couldn’t replicate. Analog hardware has inherent instabilities—oscillators drift in pitch, filters behave slightly differently each time they’re triggered. This organic chaos was considered the magic ingredient. However, the game has changed dramatically. Modern virtual analog (VA) plugins are not just « emulating » analog synths; they are meticulously modeling them at a component level. Developers now model the behavior of individual capacitors and resistors, including their tolerances and temperature variations.
The result? Today’s top-tier VA plugins can deliver sounds that are virtually indistinguishable from their hardware counterparts in a blind test. They can replicate the coveted analog « warmth, » which research shows often comes from a combination of soft saturation, naturally unstable tones, and uncontrollably fluctuating parameters. But they also offer benefits that hardware can’t touch: perfect recall of patches, limitless polyphony, and complex modulation possibilities that would be impossible or prohibitively expensive in the analog domain. The line has blurred to the point where the choice is no longer about « better, » but about workflow and specific character.
This doesn’t mean analog is obsolete. The physical interaction with a hardware synth—the one-knob-per-function layout—can lead to different creative choices. As experts at Sweetwater have noted, there’s a tangible performance aspect to hardware that can’t be ignored.
Although digital synths keep getting better every year at emulating analog synths, there are definitely situations where an analog synth sounds and responds better to your performance.
– Sweetwater, Analog vs. Digital Synthesizers Guide
Ultimately, the « analog vs digital » debate is becoming irrelevant for the sound designer. Both are valid and powerful tools. The best approach is to use what inspires you and gives you the sound you’re looking for, free from the dogma of analog purity. Your laptop is a studio full of classic, perfectly modeled synths ready to be pushed to their limits.
The tools have never been better; the only limit is your imagination.
Micro-Sampling: Turning a Vocal Chop into a lush Pad
Synthesis isn’t just about oscillators. Some of the most unique and evocative sounds come from an entirely different place: granular synthesis. This technique doesn’t use traditional waveforms. Instead, it takes a small slice of an audio file—a « grain »—and plays it back repeatedly at high speed. By manipulating the size, pitch, and position of these grains, you can transform any sound into something completely new. This is the epitome of sonic alchemy, turning lead into gold, or in this case, a short vocal chop into a vast, evolving pad.
Imagine taking a one-second recording of a single sung « ahhh » note. With granular synthesis, you can dive into that single second. By taking tiny grains—often just milliseconds long—from different parts of that waveform and crossfading them, you can create a seamless, shimmering texture that retains the tonal character of the voice but loses its explicit form. Research into granular synthesis indicates that the optimal grain duration is typically in the range of 1 to 100 milliseconds, allowing for a spectrum of results from tonal clouds to rhythmic pulses. You can freeze a single moment in time, creating a drone, or slowly scan through the audio file, creating a pad that evolves with the subtle nuances of the original performance.
This is an incredibly powerful way to create sounds that are both synthetic and deeply human. The source material provides the DNA—the unique timbre and subtle imperfections of a real-world recording—while the granular engine provides the structure, transforming it into a playable instrument. It’s a way to inject pure organic chaos directly into the heart of your digital workflow. To get started, you don’t need complex source material; a simple, sustained sound is often the best place to start.
Here’s a basic workflow for turning a vocal sample into a pad using granular synthesis:
- Select sustained vowel sounds (‘aaaah’, ‘ooooh’) rather than plosive consonants as source material, as they granulate more cleanly.
- Adjust the grain size (typically 1-100ms) to control whether the result is a smooth, tonal pad or a more dissonant, textural cloud.
- Use crossfades between grains to smooth out the transitions and eliminate clicks, creating a seamless texture.
- Layer the resulting granular pad subtly with the original dry vocal or other synth elements to add texture without completely replacing the core sound.
Any sound you can record—a voice, a bell, the sound of rain—can become the raw material for your next signature patch.
Key takeaways
- True sound design is an active process of sculpting from scratch, not a passive one of tweaking presets.
- The best sounds are often hybrids, blending the precision of digital synthesis with the imperfection of organic recordings.
- Modulation is the key to creating movement and life, transforming static sounds into evolving, expressive instruments.
Demystifying synthesizers: Analog vs Digital vs FM for beginners
Diving into the world of synthesizers can feel overwhelming, with a dizzying array of terms like analog, digital, and FM. Understanding the fundamental differences between these synthesis types is the first step to choosing the right tools and making informed sound design decisions. They aren’t in competition; they are different philosophies of sound generation, each with its own unique strengths and sonic character. Thinking of them as different schools of painting—oil, watercolor, acrylic—can be a helpful analogy. You can paint a landscape with any of them, but the texture, feel, and process will be completely different.
Analog (Subtractive) Synthesis is the classic, « vintage » approach. It starts with a harmonically rich waveform from a Voltage-Controlled Oscillator (VCO) and uses a filter to subtract, or carve away, frequencies. It’s known for its warm, punchy, and sometimes unpredictable character, making it a go-to for basses and leads. Digital Synthesis is a broad category, but often refers to wavetable or sample-based synthesis. It uses computer algorithms and stored waveforms (wavetables) to generate sound. Its strength lies in its incredible versatility, ability to create complex, evolving pads, and pristine, high-fidelity sounds. Finally, FM (Frequency Modulation) Synthesis is a unique beast. It creates sound by using one oscillator to modulate the frequency of another, resulting in complex, often metallic and bell-like tones with rich harmonic content. It was famously popularized by the Yamaha DX7, which became an indispensable tool for 1980s music artists and, as noted by sources like synthesis analysis blogs, remains one of the best-selling synthesizers of all time for its bright, recognizable tonality.
Instead of asking « which is best? », the better question is « which is right for the sound I hear in my head? » The table below breaks down the core characteristics of each to help you navigate your choices.
| Synthesis Type | Sound Generation | Key Advantages | Typical Use Cases |
|---|---|---|---|
| Analog (Subtractive) | Voltage-controlled oscillators through filters | Warm, rich, organic tone; hands-on control; unique imperfections | Classic bass/lead sounds; punchy, aggressive tones |
| Digital (Wavetable) | DSP algorithms and computer technology | Versatility; high polyphony; preset storage; cost-effective | Evolving pads; complex textures; realistic instrument emulations |
| FM Synthesis | One oscillator modulates another’s frequency | Bell-like tones; metallic textures; complex harmonics | Bells; metallic tones; electric pianos; experimental sounds |
The journey to your signature sound begins with understanding your tools. Embrace them not as complex machines to be feared, but as an experimental playground waiting to be explored. Start with a single oscillator, twist that filter knob, and listen. That’s the first step to becoming a true sound sculptor.