Many players believe dynamics are about pushing more or less air. The truth is far more subtle. True musical control comes not from brute force, but from sculpting the speed, shape, and focus of the air column itself. This guide moves beyond the basics, showing you how to transform your breath from a simple ‘on/off’ switch into an artist’s tool that shapes every note, swell, and whisper, unlocking truly lyrical and expressive playing.
For many developing wind musicians, the world of dynamics feels binary. There is « on »—a solid, often loud tone—and there is « off. » The vast, expressive landscape that lies between loud and soft remains frustratingly out of reach. The common advice to « use more support » or « just blow less » often leads to new problems: playing sharp during a crescendo, a weak and unsupported quiet sound, or a complete loss of tonal center. This leaves the musician feeling stuck, unable to translate the musical shapes they hear in their head into the sounds coming from their instrument.
The journey to expressive playing isn’t about reinventing your technique; it’s about refining your understanding of the engine that drives it all: your breath. But the secret isn’t simply in the volume of air you move. The true key lies in the distinction between air *volume* and air *speed*, and in learning how to manipulate the shape of the air column before it ever reaches the instrument. This is where playing transforms from a mechanical act into a lyrical art form.
This article deconstructs the essential techniques for sculpting sound. We will explore how to swell through a phrase without sacrificing intonation, execute clean and rapid articulations, and let a note vanish into a perfect silence. By focusing on the physical sensations behind each musical gesture, you will gain the control needed to tell a story with every note you play.
To guide you through this process, this article breaks down the core components of airflow mastery into distinct, actionable techniques. The following sections will provide you with the exercises and insights needed to move beyond mechanical playing and into the realm of true musical artistry.
Summary: The art of airflow control for expressive wind playing
- The Swell: Growing Through the Phrase Without Going Sharp
- Tu-Ku-Tu-Ku: Double Tonguing for Fast Staccato Passages
- The Wiggle: Creating Warmth Without Shaking the Instrument
- The Taper: Letting the Sound Die Away into Silence Gracefully
- The High Squeak: Supporting the Airstream for Stable High Notes
- The Power of Whisper: Using Volume to Tell a Story
- The Bloom: Swelling into a Note After the Attack
- Why breath support is the foundation of tone for all wind instruments?
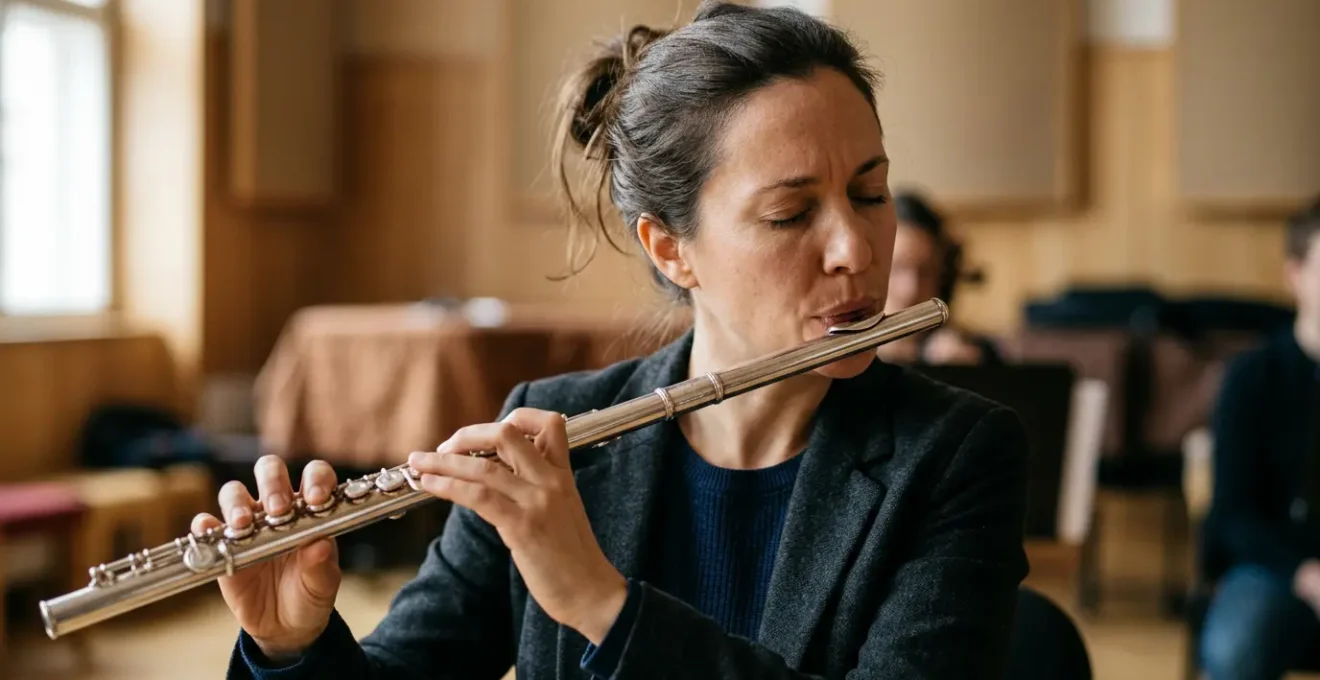
The Swell: Growing Through the Phrase Without Going Sharp
The crescendo, or « swell, » is a fundamental expressive tool, yet it’s a common source of frustration. As players push more air to get louder, the pitch has a tendency to climb, resulting in a tense, sharp sound at the peak of the phrase. This happens because players often equate « more sound » with « blowing harder » in a brute-force way. The solution is not simply more air, but faster, more focused air, combined with subtle embouchure adjustments. You must learn to increase the speed of the air column while simultaneously creating more space in the oral cavity to keep the pitch stable.
Think of your airstream like water from a hose. To make the water travel farther (analogous to a louder dynamic), you don’t just open the spigot wider (more volume); you place your thumb over the end to narrow the opening, increasing the water’s velocity. In playing, this « narrowing » is achieved by focusing the air with your embouchure and tongue position (thinking of a vowel shape like « ee » for a more focused, faster stream). As the air speed increases for the crescendo, you must compensate by relaxing the jaw slightly or thinking of a more open vowel like « ah » to prevent the pitch from rising. It’s an active balancing act between air speed and oral cavity shape.
Mastering this requires diligent practice with a tuner and a drone. The goal is to internalize the physical sensation of a crescendo that maintains a stable tonal center, divorcing the concept of « loud » from « sharp. » The following method provides a structured way to build this crucial skill.
Your Action Plan: 4-Step Drone-and-Tuner Practice Method
- Set up a drone tuned to your practice note and place a tuner in clear view to monitor pitch stability in real-time.
- Begin playing a sustained note at mezzo-piano dynamic, ensuring perfect alignment with the drone pitch.
- Execute a gradual crescendo over 8-10 seconds, using increased air speed (not just volume) while making micro-adjustments with embouchure and vowel shape (transitioning from ‘Ah’ to ‘Oo’ internally).
- Monitor the tuner throughout the crescendo, aiming to keep pitch deviation within ±5 cents; repeat until you can execute three consecutive swells with stable intonation.
By consciously managing these variables, the swell transforms from a source of anxiety into a powerful tool for musical shaping, allowing your phrases to grow in intensity without sacrificing beauty of tone or accuracy of pitch.
Tu-Ku-Tu-Ku: Double Tonguing for Fast Staccato Passages
When the music demands rapid-fire articulation, single tonguing quickly reaches its physical limit. Double tonguing is the technique that unlocks speed and clarity in fast staccato passages. It breaks the bottleneck of using only the front of the tongue by introducing a second articulation point farther back. The most common syllables used to teach this are « Tu-Ku » or « Da-Ga. » The « Tu » or « Da » is the familiar front-of-the-tongue stroke, while the « Ku » or « Ga » is a secondary stroke created by the back of the tongue hitting the soft palate, momentarily interrupting the air.
The primary challenge in double tonguing is achieving evenness. For most players, the « Ku » stroke is initially weaker and less defined than the familiar « Tu. » The goal is to make the two sounds indistinguishable, creating a seamless string of articulated notes. This requires isolating the back-of-the-tongue motion and strengthening it until it has the same crispness as the front stroke. This process begins away from the instrument, simply speaking the syllables until they feel fluid and balanced.

As the mouthpiece detail above suggests, articulation is a precise mechanical act. A constant, well-supported airstream is the canvas upon which these articulations are painted. The tongue acts as a valve, interrupting this stream with minimal motion. Tension is the enemy of speed; the tongue, jaw, and throat must remain relaxed, allowing the articulations to be light and efficient. As Martin Freres Woodwinds, a respected manufacturer, notes, achieving proficiency takes time. According to their guide on double tonguing technique and history:
Most players need 4-8 weeks of daily work (10-15 minutes per day) to reach a clean, even double tongue at quarter note = 120 BPM in sixteenth notes.
– Martin Freres Woodwinds, Double tonguing on clarinet: technique, exercises, history
Patience and methodical practice are key. Rushing the process will only ingrain bad habits and unevenness. By following a progressive protocol, you can build a clean, fast, and reliable double tongue.
Your Action Plan: Progressive Double Tonguing Development Protocol
- Phase 1 (Off-Instrument): Practice syllables ‘ta-ka’ and ‘da-ga’ as spoken tongue twisters until both strokes feel equally natural and effortless.
- Phase 2 (Mouthpiece Only): Blow steady air through mouthpiece while articulating ‘ta-ka’ pattern at 60 BPM, 2 notes per beat, focusing on making both syllables identical in volume and clarity.
- Phase 3 (Single Pitch): Apply pattern to a comfortable mid-register note (e.g., concert F), starting at 60 BPM and increasing tempo by 4-6 BPM increments only after achieving 8-16 clean, tension-free repetitions.
- Phase 4 (Scale Application): Once comfortable at 120 BPM on single notes, apply double tonguing to major scales, one pattern per scale degree, ensuring finger coordination remains independent of tongue movement.
Ultimately, double tonguing should feel less like a muscular effort and more like a light, rhythmic dance of the tongue on a steady column of air.
The Wiggle: Creating Warmth Without Shaking the Instrument
Vibrato, that gentle « wiggle » in the sound, is what gives a sustained note warmth, life, and vocal-like expression. It transforms a static pitch into a dynamic, shimmering tone. However, many young players attempt to create it by physically shaking the instrument or through uncontrolled throat tension, resulting in a nervous, unstable sound. True, musical vibrato is a controlled oscillation that originates from a specific source: the breath, the jaw, or the lips. It’s a subtle wave added to an otherwise perfectly steady and supported airstream.
As the Musical Instrument Hub explains, the type of vibrato used often depends on the instrument family and musical style. For a flutist in an orchestra, a smooth, diaphragmatic (breath-based) vibrato is the standard. For a jazz saxophonist, a wider, more personal jaw vibrato is more common. The key is to understand that these are distinct physical actions, not just random shaking.
As experts note in an analysis of different vibrato types, it’s not a universal technique.
Vibrato is not a one-size-fits-all technique; different styles exist depending on musical tradition, instrument, and desired effect.
– Musical Instrument Hub, What Is Vibrato? How It Works & Used
Understanding the different mechanisms is the first step toward developing a controlled and stylistically appropriate vibrato. Each type has its own characteristic sound and application, and a mature musician knows which to choose to best serve the music.
| Vibrato Type | Mechanism | Best Suited For | Characteristic Sound | Primary Challenge |
|---|---|---|---|---|
| Diaphragmatic (Breath) | Pulsing air pressure via abdominal muscles | Flute, oboe; smooth lyrical passages | Gentle, natural wavering | Can interfere with steady airflow if overused |
| Jaw | Up-and-down jaw motion (‘ya-ya-ya’) | Saxophone, clarinet (jazz); euphonium, trombone | Warmer, vocal-like quality | Controlling speed and width consistently |
| Lip (Embouchure) | Manipulating lip tension and corners | Brass (especially trumpet); fast, narrow classical vibrato | Tight, focused oscillation | Avoiding pitch instability |
| Throat | Subtle laryngeal/pharyngeal adjustments | Advanced flute technique; subtle color changes | Delicate, intimate tone variation | Difficult to isolate and teach |
Before attempting any vibrato, you must first be able to hold a perfectly straight, beautiful tone. Vibrato is the seasoning, not the main ingredient. Once you have a steady foundation, you can begin to introduce these subtle pulses, always listening to ensure the core of the pitch remains stable and the tone beautiful.
The Taper: Letting the Sound Die Away into Silence Gracefully
Just as important as a note’s beginning is its end. A beautifully executed diminuendo to nothing (al niente), or « taper, » can be one of the most breathtaking moments in music. Yet, it’s often a point of weakness. Players either stop the note abruptly or lose tone quality and pitch control as the volume decreases, resulting in a sagging, anemic sound. A graceful taper requires maintaining the same core support and air focus at pianissimo as you have at forte. The sound should diminish, but the intensity and quality of the support must not.
The mistake is to « let up » on the support as you get quieter. Instead, you should think of your abdominal muscles remaining engaged while you control a progressively smaller, finer, yet still fast-moving stream of air. It’s like turning down a gas flame: the pressure in the line remains constant, but the valve is slowly closed to reduce the flow. Your embouchure may also need to become slightly firmer to maintain the aperture for this very fine airstream, preventing the pitch from going flat.
Practicing this control away from the instrument is highly effective. By using a « hissing » exercise, you can focus solely on the sensation of maintaining a steady, supported exhale as the volume decreases. This builds the muscular control and mental focus required to execute a perfect taper on your instrument.
Your Action Plan: Reversed Hissing Exercise for Diminuendo Control
- Step 1 (Off-Instrument): Inhale slowly until lungs are completely full, hold for one second.
- Step 2: Begin a loud, forceful hiss through slightly parted teeth or lips, maintaining maximum volume for 2-3 seconds.
- Step 3: Gradually taper the hiss over 10-15 seconds, decreasing volume continuously while keeping the airflow controlled and steady (not pulsing).
- Step 4: Bring the hiss to complete silence while still engaging abdominal support; hold lungs empty for one second before repeating.
- Step 5 (With Instrument): Once mastered off-instrument, apply the same controlled taper to a sustained mid-register note, using a tuner to ensure pitch stability throughout the diminuendo to niente.
With practice, the end of a note becomes as much a part of your expressive toolkit as its beginning. You gain the ability to create moments of profound stillness, drawing the listener in until the sound vanishes into pure silence.
The High Squeak: Supporting the Airstream for Stable High Notes
The upper register presents a unique aerodynamic challenge. High notes require the fastest, most compressed, and most focused airstream. Many players try to achieve this by pinching their embouchure and using excessive mouthpiece pressure, which chokes the sound, produces a thin tone, and causes fatigue. The « high squeak » or unstable high note is often a symptom of insufficient air speed and support, not a failing embouchure. The solution is to think « faster air, » not « tighter lips. »
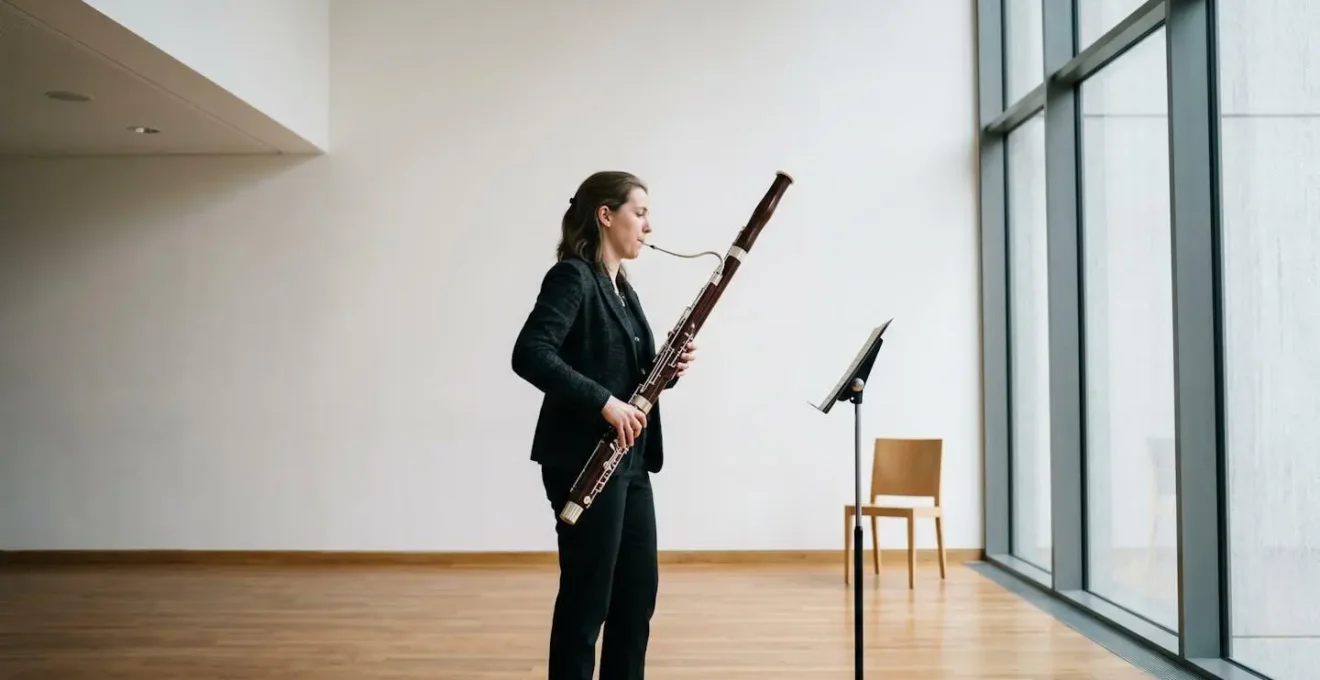
As the photo suggests, proper posture and a relaxed upper body are crucial. Tension in the shoulders and throat will impede the flow of air. The power must come from your core, propelling a laser-focused column of air. To facilitate this, use a higher tongue position, as if you are saying the vowel « ee. » This narrows the oral cavity, accelerating the air just before it reaches the embouchure. This speed, not brute force, is what coaxes the instrument’s upper harmonics to speak clearly.
The legendary Chicago Symphony tubist Arnold Jacobs was a pioneer in the study of wind playing physiology. His research revealed a fascinating, counter-intuitive truth about air. In a foundational article on airflow and pressure across brass instruments, his findings are cited:
In the trumpet, [the high register] uses the least amount of air flow but under the greatest amount of pressure, around one-half to one pound of pressure. In extreme circumstances, the pressure can be as high as three pounds.
– Arnold Jacobs, Chicago Symphony Orchestra (cited), 25 Years – Air Pressure / Air Flow
This is the key insight: high notes are about high pressure and high speed, but not necessarily high volume of air. You must generate immense core support to create this pressure, but the aperture is so fine that the actual amount of air expended can be quite small. It’s a highly efficient system, and thinking of it this way can revolutionize your approach to the upper register, replacing strain with stability.
When you provide the instrument with the correct speed and focus of air, high notes cease to be a source of fear. They become just another color in your musical palette, accessible with the same ease and beauty as the rest of the instrument’s range.
The Power of Whisper: Using Volume to Tell a Story
The softest dynamics are often the most powerful and captivating. A true pianissimo draws the listener in, creating moments of intimacy and suspense. But for many players, playing softly means the tone becomes weak, airy, and unsupported. They simply « back off » the air, and the sound collapses. The secret to a great soft sound is the same as a great loud sound: a fully supported, energetic airstream. The difference lies in the size of the aperture the air is flowing through.
Think of a whisper. A projected stage whisper is full of energy and intensity, yet it has very little volume. This is the quality you want in your soft playing. The abdominal muscles are still engaged, providing a solid foundation of support. The air itself is moving quickly and is highly focused, but the quantity of air being released is very small. This creates a sound that is vibrant and alive, even at the lowest dynamic levels. It requires incredible control and a great deal of resistance in the system, provided by the embouchure and the instrument itself.
Interestingly, some instruments are inherently more efficient than others. The oboe, for example, is famous for requiring very little air, which demands immense control from the player. The late Arnold Jacobs noted that even at its loudest, the oboe’s airflow is minimal:
The oboe requires the least amount of air of all wind instruments. In pianissimo playing, the flow rate is about two and one-half liters per minute and in fortissimo, would go up to about five liters per minute.
– Arnold Jacobs (cited in Windsong Press), 25 Years – Air Pressure / Air Flow
This illustrates that a powerful sound isn’t always about moving a large volume of air. The consistent practice of controlled breathing has profound physiological effects. For example, a University of Zurich study found that regular practice on the didgeridoo, an instrument requiring continuous airflow, significantly reduced daytime sleepiness in patients by strengthening respiratory muscles. This demonstrates how dedicated breath work builds a foundation of control that translates directly into musical mastery.
By treating your softest notes with the same energy and support as your loudest, you unlock a new level of storytelling. Your dynamics gain a third dimension, allowing you to command the listener’s attention not with volume, but with intensity.
The Bloom: Swelling into a Note After the Attack
The « bloom » is an elegant and expressive technique where a note begins softly with a clear attack and then immediately swells or « opens up » in volume and tonal richness. It’s like watching a flower unfurl in fast motion. This effect is perfect for the beginning of a lyrical phrase, a resolution point in a melody, or any note that needs to emerge with grace and presence. It’s the opposite of a harsh, accented start; instead, the note is born gently and quickly grows to its full sonic potential.
Executing a bloom requires the perfect coordination of three elements: a light, clean tongue attack; immediate engagement of breath support for a crescendo; and an embouchure that can accommodate the expanding sound without letting the pitch waver. The common mistake is to either have a heavy attack that prevents the initial softness, or to have a weak attack that gets lost as the swell begins. The key is to separate the components in your mind and in your practice.
You must first master a clean, delicate tongue stroke that does not disturb the embouchure. Then, you must be able to initiate a quick, supported crescendo from a soft dynamic. The « bloom » is the seamless integration of these two skills, where the swell begins the instant the tongue releases the air. The attack is merely the « seed, » and the breath support is the energy that makes it blossom instantly.
Your Action Plan: Auditing Your Note Bloom
- Points of contact: Practice clean, light tongue attacks at a piano dynamic on their own. Then, practice quick crescendos on sustained notes without any attack. Isolate both components.
- Collecte: Record yourself playing a simple lyrical phrase, attempting to « bloom » the first note of each sub-phrase. Listen back: is the attack clean? Does the swell start immediately? Is the tone full at the peak?
- Cohérence: Play a single blooming note while watching a tuner. Does the pitch remain stable (within 5 cents) from the initial attack through the peak of the swell? Or does it go sharp or flat?
- Mémorabilité/émotion: Does the resulting sound feel like an « unfurling flower »? Or is it more of an abrupt « soft-LOUD » effect? The goal is a smooth, organic growth in the sound.
- Plan d’intégration: Based on your audit, identify the weak link. If the attack is too heavy, focus on Phase 1 exercises. If the swell is delayed or the pitch is unstable, focus on Phase 2 (deliberately delaying the swell to feel the separation) and Phase 3 (integrating them).
When mastered, the bloom gives your playing a sense of effortless power and grace, allowing you to shape the start of every phrase with intention and beauty.
Key Takeaways
- True dynamic control comes from manipulating air speed and focus, not just air volume.
- Advanced techniques like double tonguing and vibrato rely on a foundation of steady, supported airflow.
- Both the loudest and softest notes require full core engagement; control comes from the aperture, not a lack of energy.
Why breath support is the foundation of tone for all wind instruments?
Every technique discussed—from the most powerful swell to the most delicate whisper—is built upon a single, non-negotiable foundation: breath support. It is the engine that drives the sound, the canvas on which all musicality is painted. Without a steady, controlled, and engaged airstream, even the most agile fingers and precise tongue are useless. Breath support is the active, conscious management of your respiratory muscles to produce an airstream with the exact pressure and speed the music demands.
This is not just passive exhaling. It involves a 360-degree expansion of the lower torso upon inhalation (diaphragmatic breathing) and the continuous engagement of the abdominal and lower back muscles during exhalation. This engagement creates a stable pressure against which the embouchure and instrument can work, resulting in a full, resonant, and stable tone. This control is what allows advanced wind performers to demonstrate the ability to sustain a note for over a minute. Furthermore, the benefits are physiological; dedicated practice leads to measurable improvements in lung function, as research on respiratory training programs shows a significant increase in metrics like FEV1 and MVV after consistent training.
The landmark research involving the Chicago Symphony Orchestra’s principal brass players provided scientific proof for what great players had known intuitively for generations. It codified the relationship between airflow and air pressure.
Case Study: Chicago Symphony Brass Section Airflow Study (1959-1960)
In the late 1950s, four principal brass players from the Chicago Symphony Orchestra—including trumpeter Adolph Herseth and tubist Arnold Jacobs—participated in testing at the University of Chicago to measure airflow and pressure. The study revealed that the tuba uses the greatest air volume but under the least pressure, while the trumpet uses the least air volume but under the greatest pressure. This established the foundational understanding that while all wind instruments rely on the same support muscles, the specific relationship between airflow volume and pressure varies dramatically by instrument, requiring tailored but fundamentally similar breath support techniques.
This means that while a tuba player and a trumpet player feel very different levels of back-pressure, both rely on the exact same mechanism of core engagement to produce their characteristic sounds. Improving your breath support is the single most effective way to improve your tone, intonation, and dynamic control.
Your Action Plan: Three Advanced Breath Support Exercises
- Resistance Hissing: Constrict your mouth to a small opening and hiss slowly, simulating back-pressure. Inhale and exhale as slowly as possible through this opening to build pressure tolerance and control.
- 360° Expansion Awareness: Place hands on your lower back and sides. Practice diaphragmatic breathing, focusing on expanding your entire lower torso in all directions, like a cylinder.
- Postural Alignment with Wall-Sits: Perform a wall-sit while practicing slow, controlled breathing. This engages your core and teaches you to feel proper support without creating tension in your upper body.
By making these exercises a part of your daily routine, you are not just practicing breathing; you are building the very core of your musical voice. This unwavering support is what finally turns that « on/off » switch into a sensitive dial, giving you access to the full spectrum of dynamic and expressive possibilities.