Achieving superior tone from a string instrument goes far beyond routine maintenance; it requires a deep appreciation for its underlying physics. This guide moves past surface-level tips to explore how the hygroscopic nature of wood, the mechanics of string vibration (inharmonicity), and the precise geometry of its setup are the true determinants of an instrument’s sound and health. By treating your instrument as a dynamic physical system, you can make informed decisions that unlock its full acoustic potential and ensure its longevity.
As a musician, you share an intimate bond with your instrument. It’s a relationship built on touch, practice, and a mutual quest for the perfect sound. Yet, many players focus solely on musical technique while overlooking the complex physical science that governs their instrument’s voice. We are often told to change strings or wipe down the body, but the fundamental principles behind this advice remain a mystery. This can lead to frustration when a once-vibrant cello develops a crack, a favorite guitar loses its resonance, or a violin’s tone becomes inexplicably dull.
The common wisdom about instrument care—while not wrong—often fails to address the core « why. » The real key to a superior, consistent tone and a long, healthy life for your instrument isn’t just about following a checklist of maintenance tasks. It’s about understanding the instrument as a living, breathing system of interconnected physical forces. It’s about grasping the science of wood movement, the physics of string decay, and the precise mechanics of its setup.
This guide offers a luthier’s perspective, shifting the focus from « what to do » to « why it works. » We will dissect the physical phenomena that dictate your instrument’s behavior. By exploring the science behind wood’s reaction to humidity, the mechanics of rosin friction, the concept of inharmonicity in aging strings, and the delicate balance of a proper setup, you will gain the knowledge to not just maintain your instrument, but to truly master its physical and acoustic properties. This understanding empowers you to become a more discerning caretaker, capable of diagnosing issues before they escalate and unlocking a level of tonal quality you may not have thought possible.
This detailed exploration is structured to guide you from the foundational material of your instrument to the nuances of its setup and even your own posture. The following sections will provide a clear roadmap into the physics of great sound.
Summary: Understanding the Physics and Maintenance of String Instruments for Better Tone
- Wood Movement: Why Winter Heating Cracks Your Cello
- Rosin Dust: How Much is Too Much for Tone Production?
- Dead Tone: When to Change Strings Before They Snap on Stage
- High vs Low Action: Finding the Sweet Spot for Playability and Tone
- Intonation Issues: Why Moving the Bridge 1mm Fixes Your Tuning
- Sitting or Standing: Which Posture Minimizes Back Pain for Guitarists?
- Drop D and Open G: Reading Tabs for Alternate Tunings
- Guitar Tablature: The pros, cons, and how to use it effectively
Wood Movement: Why Winter Heating Cracks Your Cello
The most fundamental component of your string instrument is the wood itself, and it is far from static. Wood is a natural material that behaves like a sponge, constantly interacting with the ambient moisture in the air. This essential property is the root cause of many seasonal problems, particularly the dreaded cracks that appear in winter. The phenomenon is known as hygroscopic movement, and understanding it is the first principle of responsible instrument care.
As the experts at Johnson String Instrument explain, the physics are straightforward yet powerful:
Wood is hygroscopic, meaning that it attracts and absorbs moisture from the atmosphere. As it takes on moisture, wood swells. As it dries, it shrinks.
– Johnson String Instrument, Winter protection for your stringed instrument
During humid summer months, your cello or guitar absorbs moisture and swells slightly. This is generally harmless. The danger arrives in winter when indoor heating systems drastically reduce the air’s relative humidity. The dry air pulls moisture out of the wood, causing it to shrink. Because different parts of the instrument (like the spruce top and maple back) shrink at different rates, immense stress builds up. When this tension exceeds the wood’s structural limit, a crack forms—often suddenly and audibly. To prevent this, maintaining a stable environment is paramount. A study published in Strings Magazine confirms that keeping an instrument in an environment with 40-60% relative humidity is the accepted industry standard for preventing such damage.
Rosin Dust: How Much is Too Much for Tone Production?
For violinists, violists, and cellists, rosin is the critical link between the bow and the string, transforming smooth horsehair into a surface that can grip and excite the string into vibration. However, the amount and condition of the rosin are a delicate balance. Too little, and the bow glides silently; too much, and the tone becomes choked and raspy, accompanied by a cloud of white dust. The ideal application is not a matter of guesswork but of understanding the physics of friction at a microscopic level.
The magic of rosin lies in its unique frictional properties, a phenomenon known as stick-slip motion. The bow hair, coated in tiny rosin particles, momentarily « sticks » to the string, pulling it aside. As the tension in the string increases, it overcomes the static friction and « slips » back, vibrating as it does. This cycle repeats hundreds of times per second to create a sustained note.

This microscopic dance is incredibly sensitive. As the UBC Physics Department notes, the difference between static (stick) and kinetic (slip) friction is key:
Rosin has the peculiar property that if there is no motion between the rosin and the string, the string tends to stick to the rosin. Once the string begins to move however, a force of friction between the rosin and the string drops rapidly.
– UBC Physics Department, The Physics of the Violin – Negative Damping
Excessive rosin buildup interferes with this process. It creates a cakey, uneven surface on both the bow hair and the string, dampening the string’s vibration and producing a harsh, gritty sound. The goal is to apply just enough fresh rosin for a clean « bite »—typically three to five slow swipes are sufficient. Wiping excess rosin dust off your instrument’s body and strings after each session is not just for aesthetics; it prevents this buildup from impacting your sound production.
Dead Tone: When to Change Strings Before They Snap on Stage
Every musician has experienced it: a set of strings that has lost its brilliance, sparkle, and sustain. The tone becomes dull, the instrument feels less responsive, and tuning becomes a constant battle. This « dead » sound is not just a subjective feeling; it’s a measurable physical change in the string. Waiting for a string to snap is a poor strategy; a proactive approach based on understanding the physics of string aging is far better for both your sound and your performance confidence.
The primary culprit behind a dead tone is a phenomenon called inharmonicity. A new string vibrates cleanly, producing a strong fundamental pitch and a predictable series of harmonic overtones. As a string ages, it accumulates microscopic dirt, skin oils, and sweat in its windings. This added mass is not distributed evenly, and the string’s flexibility is compromised. As a result, its vibrational pattern becomes more complex and chaotic, and the overtones are no longer in perfect harmony with the fundamental pitch. This acoustic dissonance is what our ears perceive as a dull or « dead » tone. As research published in the Journal of the Acoustical Society of America demonstrates, this increased inharmonicity is due to these changes in mass and stiffness.
Wound strings, like those on a guitar, cello, or the lower strings of a violin, are particularly susceptible to this aging process, as their complex construction provides more places for debris to accumulate.
Case Study: The Unpredictable Aging of Wound Strings
The complexity of wound strings was highlighted in a 2022 study in the American Journal of Physics. Researchers measured the inharmonicity in various guitar string types. While their measurements for solid (monofilament) strings perfectly matched theoretical models, the results for wound strings were wildly unpredictable. This proved that as wound strings age, the non-uniform changes in their mass and flexibility lead to complex and chaotic inharmonicity, explaining why they are often the first to sound « dead » and fail to hold their tuning at higher frets.
Instead of following a rigid schedule, learn to listen for the signs: a loss of brightness, poor intonation as you play up the neck, and a string that feels stiff or unresponsive. These are physical indicators that inharmonicity has set in and it’s time for a change.
Action Plan: Your Instrument’s Tone and Health Audit
- Visual Inspection: Examine the entire instrument for signs of stress. Check for fine lines in the varnish (early crack indicators), open seams where glue has failed, and any warping of the top.
- String Assessment: Check the string windings over the fretboard or fingerboard. Look for discoloration, grime, and flat spots from fret contact. Listen for a loss of sustain and brightness.
- Hardware Check: Gently test tuning pegs, fine tuners, and bridge placement. Is anything loose? Does the bridge appear to be leaning or out of position? On a guitar, check saddle and nut grooves for wear.
- Playability Test: Play notes on every string at every fret/position. Listen for buzzing, dead spots, or notes that sound strangely out of tune (poor intonation). Is the string height (action) comfortable or has it changed?
- Environmental Audit: Use a hygrometer to measure the relative humidity where your instrument is stored. Is it consistently within the safe 40-60% range? Note any recent drastic changes in temperature or humidity.
High vs Low Action: Finding the Sweet Spot for Playability and Tone
The « action » of a string instrument refers to the height of the strings off the fingerboard or fretboard. It is one of the most critical and personal aspects of an instrument’s setup, creating a direct trade-off between ease of play and tonal quality. There is no single « correct » action; finding your personal sweet spot requires understanding the acoustic compromise at play. A lower action is easier to play, while a higher action often yields a better tone.
A low action means the distance your fingers must press the string is shorter. This allows for faster playing, requires less fretting-hand strength, and can feel much more comfortable, especially for beginners or those playing complex passages. However, this proximity to the frets comes with a tonal cost. The string has less room to vibrate freely, which can lead to fret buzz, a thinner sound, and reduced volume and sustain. The string’s vibrational arc is constricted, limiting its ability to resonate fully.
Conversely, a high action gives the string ample space to vibrate. This allows for a more powerful, open, and resonant tone with greater dynamic range and sustain. This is explained well by Scott Marquart of Stringjoy:
Higher action tends to sound a lot more open, especially if you’re strumming chords. This is because there’s more distance between the strings and the individual frets, making it so they can fully resonate without coming into any contact with the frets.
– Scott Marquart, Stringjoy
The downside, of course, is playability. A higher action demands more finger pressure, which can slow down your playing and cause fatigue. It can also create intonation problems, as pressing the string further down can slightly sharpen the note. The ideal setup is therefore a compromise: as low as possible for comfort, but just high enough to eliminate fret buzz and allow the strings to sing with their full voice. This « sweet spot » will vary depending on your playing style, string gauge, and the unique geometry of your instrument.
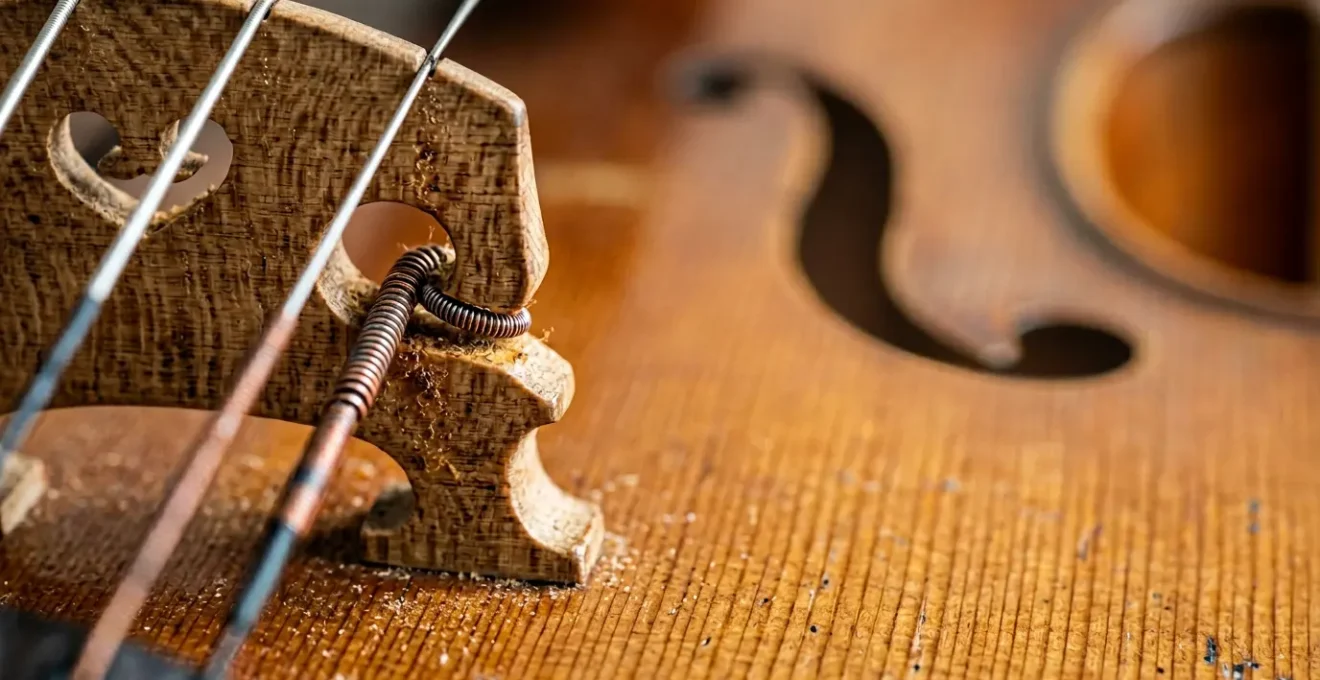
Intonation Issues: Why Moving the Bridge 1mm Fixes Your Tuning
Few things are more frustrating for a musician than an instrument that refuses to play in tune with itself. You can tune the open strings perfectly, but as you play higher up the neck, the notes become progressively sharp or flat. This problem is known as poor intonation, and it is almost always a problem of physics and geometry, not a fault in your ear or tuning method. The solution often lies in minuscule adjustments to the string’s speaking length, typically at the bridge.
In a theoretically perfect world, the 12th fret would be exactly at the midpoint of the string’s length (from nut to bridge saddle). Pressing the string at the 12th fret would halve its length and raise the pitch by a perfect octave. However, the act of pressing the string down stretches it slightly, increasing its tension and causing the fretted note to sound sharp. To counteract this, the bridge saddle must be moved slightly further away from the nut, a process called compensation. This adds a tiny amount of length to the string to ensure the fretted 12th-fret note is a true octave of the open string.
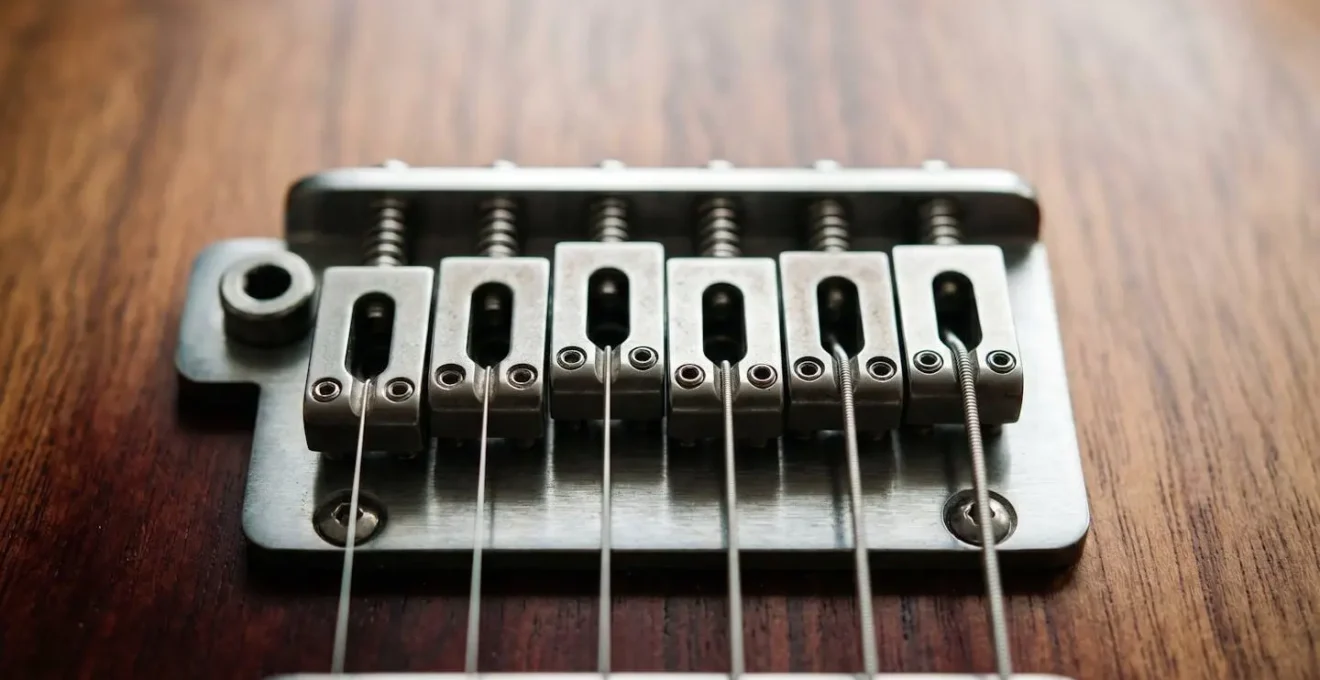
Each string, due to its different thickness and tension, requires a slightly different amount of compensation. This is why on an electric guitar, you see six individual saddles that can be adjusted forward and backward. On an acoustic guitar, the single saddle is often angled. On a cello or violin, the entire bridge can be minutely tilted or repositioned. If the 12th-fret note is sharp compared to the open string’s harmonic, the saddle needs to move back (lengthening the string). If it’s flat, the saddle needs to move forward (shortening the string). These adjustments can be as small as a single millimeter but make all the difference between a sour-sounding instrument and one that rings true across its entire range.
Sitting or Standing: Which Posture Minimizes Back Pain for Guitarists?
The instrument itself is only one half of the acoustic system; the other half is the player’s body. Your posture, whether sitting or standing, has a profound impact not only on your long-term physical health but also on your tone and technique. For guitarists, the debate between sitting and standing often revolves around performance style, but the ergonomic considerations are critical for minimizing chronic pain and maximizing playing efficiency.
Standing, often preferred for stage performance, promotes a more dynamic and open posture. It allows the body to move naturally, which can help dissipate tension. The key is a properly adjusted strap that holds the guitar at a consistent height and angle, preventing you from hunching over. A guitar held too low forces the wrist into an acute angle and causes the spine to curve, leading to back and shoulder pain. A guitar held too high can strain the shoulder of the picking/strumming arm. The ideal standing position keeps the spine neutral and both wrists relatively straight.
Sitting is the standard for practice, classical, and acoustic playing. However, it presents its own ergonomic traps. The most common mistake is slumping over the guitar, curving the spine into a « C » shape. This posture compresses the diaphragm, restricting breathing, and puts immense strain on the lower back and neck. Using a footstool (for the classical position) or a support cushion on the lap helps raise the guitar to an optimal height. This encourages an upright posture, allowing the arms to hang freely and the spine to remain elongated. The goal when sitting is to bring the guitar to your body, not to collapse your body around the guitar. Ultimately, the best choice is often to vary your position, preventing any single set of muscles from becoming chronically overworked.
Drop D and Open G: Reading Tabs for Alternate Tunings
Alternate tunings like Drop D (D-A-D-G-B-E) and Open G (D-G-D-G-B-D) are powerful creative tools, opening up new sonic textures, drones, and chord voicings that are impossible in standard tuning. While guitar tablature makes it easy to read the fret numbers for these tunings, it’s crucial to understand the physical consequences of altering your strings’ tension. Changing your tuning is not just a musical decision; it’s an engineering one that affects tone, playability, and even the instrument’s structural integrity.
When you tune a string down, you decrease its tension. A lower-tension string becomes « floppier » and has a wider vibrational arc. This can be great for a heavy, resonant sound, but it can also lead to fret buzz if your action is too low. More subtly, it changes the string’s acoustic properties. For example, a 2020 study in Discover Applied Sciences found that lower-tension strings exhibit increased inharmonicity, especially when fretted high on the neck. This can give them a slightly quirky, chorus-like character, but can also make precise intonation more challenging.
Conversely, tuning strings up increases tension, putting more stress on the instrument’s neck and top. This can make the strings feel stiffer and harder to bend, but can also produce a brighter, more focused tone. The total tension of a set of strings in standard tuning is already significant (often over 150 lbs on an acoustic guitar). Drastically changing this balance by using multiple alternate tunings without adjusting your setup can cause the neck’s curvature (relief) to change, affecting your action and intonation. For players who frequently use a specific alternate tuning, it’s often wise to have a guitar set up specifically for it, with an appropriate string gauge and truss rod adjustment to handle the unique string tension dynamics.
Key Takeaways
- Instrument health is governed by physics; understanding principles like hygroscopic wood movement and string inharmonicity is more effective than just following maintenance rules.
- Sound quality is a series of trade-offs. Choices like action height and string tension are compromises between playability, comfort, and acoustic resonance.
- Small, precise adjustments matter. A 1mm shift in a bridge or a few swipes of rosin can dramatically alter an instrument’s tone and intonation.
Guitar Tablature: The pros, cons, and how to use it effectively
Guitar tablature, or « tabs, » is a beautifully simple and intuitive system of notation. Instead of musical notes on a staff, it provides a visual map of the fretboard, telling a player which string to play and at which fret. This accessibility has empowered countless self-taught guitarists, allowing them to learn songs quickly without formal music theory training. However, while effective, it’s important to recognize its limitations and understand what physical and musical information it leaves out.
The great pro of tablature is its directness. It bypasses the mental translation required by standard notation (« this dot on the staff means a G, which on my guitar is the 3rd fret of the E string ») and provides an immediate physical instruction. This makes it incredibly efficient for learning riffs, solos, and chord shapes, particularly for visual learners. It’s the lingua franca of the online guitar community.
However, the major con is its lack of rhythmic information. Most basic text-based tabs give no indication of a note’s duration or the rhythm in which it should be played. The player is expected to know the song already and use the tab as a reference for the notes. While more advanced tabs incorporate rhythmic notation, they remain less precise than a standard musical score. Furthermore, tabs are instrument-specific and offer little insight into the underlying harmony or music theory. They tell you *what* to play, but not *why* those notes work together. This can sometimes hinder a musician’s deeper understanding of song structure and improvisation. An effective musician often uses tabs in conjunction with their ear, listening to the recording to capture the feel, rhythm, and dynamics that the tablature alone cannot convey.
By moving beyond simple maintenance routines and embracing the physics of your instrument, you elevate yourself from a player to a true custodian of its voice. This deeper understanding allows for a more responsive and symbiotic relationship, ensuring your instrument not only lasts a lifetime but sounds its absolute best throughout it.