
The biggest mistake parents make isn’t choosing the ‘wrong’ instrument, but choosing one that is physically difficult or painful for a child to play.
- An instrument’s size, string tension, and setup (its « playability ») are far more critical for a beginner’s success than its brand or price tag.
- Cheap, poorly made instruments—especially those bought online—are a leading cause of frustration and quitting, often mistaken by parents as a lack of interest.
Recommendation: Prioritize a quality rental or a budget-friendly instrument that has been professionally set up over a seemingly good deal on a factory-sealed box.
The image is a familiar one for many parents: a child’s fleeting interest in music sparks a late-night search for a beginner instrument. The internet presents a dizzying array of colorful, incredibly cheap options promising to unlock their inner Mozart for under a hundred dollars. It feels like a low-risk way to test the waters. You add a shiny, violin-shaped object or a miniature guitar to your cart, believing you’re giving your child a wonderful opportunity. But what if this well-intentioned, budget-conscious decision is the very thing that guarantees they will quit within six months?
Most advice focuses on which instrument is « best, » often defaulting to the piano or a small acoustic guitar. While these are excellent choices, this approach misses the most critical factor in a child’s early musical experience: ergonomic fit. An instrument that is too large, has strings that are too tight, or keys that are too heavy doesn’t just present a challenge; it can cause physical pain and frustration. The child doesn’t know the instrument is at fault; they simply conclude, « This is too hard, » or « I’m not good at this. » The problem isn’t their talent or dedication, but the playability threshold of the tool in their hands.
This guide shifts the focus from « what to buy » to « how to choose. » Instead of simply listing popular instruments, we will dissect the physical characteristics that make an instrument suitable—or unsuitable—for a child’s specific age and size. We’ll explore why four strings are often better than six for small hands, why « heavy » keys can be a barrier, and how a simple rental can be a far smarter financial decision than a cheap purchase. By understanding the physics of these instruments, you can avoid the common pitfalls and give your child an instrument that invites them to play, rather than one that fights them every step of the way.
This article will guide you through the essential ergonomic and practical considerations for choosing a starter instrument. By focusing on fit and function, you can make a choice that nurtures your child’s interest from the very first note.
Summary: A Parent’s Ergonomic Guide to First Instruments
- Why Is It Always the Recorder? Pros and Cons of the Plastic Flute
- Small Hands: Why 4 Strings Are Easier Than 6 for a 6-Year-Old
- Weighted Keys: Does It Matter for a Beginner?
- Why Starting with Drums Builds a Solid Rhythmic Foundation
- Growing Kids: Why Renting a Violin Is Smarter Than Buying
- Which Method Fits Your Child’s Personality Best?
- High vs Low Action: Finding the Sweet Spot for Playability and Tone
- Understanding the physics and maintenance of string instruments for better tone
Why Is It Always the Recorder? Pros and Cons of the Plastic Flute
For many, the recorder is the quintessential « first instrument, » often introduced in elementary school music programs. Its ubiquity leads some parents to dismiss it as a mere toy, a pre-instrument before the « real » learning begins. However, its widespread use is no accident; the plastic recorder is a deliberately chosen educational tool with distinct ergonomic and pedagogical advantages. Its low cost, durability, and simple design make it highly accessible.
The primary benefit of the recorder lies in its direct transference of skills. It teaches the fundamentals of breath control, articulation (using the tongue to start notes), and finger-note coordination in a very linear way. According to music education research, this foundational experience is highly valuable, as recorder playing prepares students for band and orchestra instruments like the clarinet, oboe, flute, and saxophone. The fingerings for the first octave are intuitive and help build the dexterity needed for more complex woodwinds.
However, the recorder is not without its drawbacks. Its shrill tone, especially in the hands of an enthusiastic beginner, can be grating for household members. More importantly, while it teaches basic fingering and breath, it doesn’t introduce the broader musical concepts of harmony or chords. Its simplicity can also become a limitation; a child may quickly master its capabilities and grow bored without a clear path to more challenging music. It’s an excellent starting point for wind instruments but a potential dead end if not supplemented with a broader musical education.
Ultimately, the recorder serves its purpose best as a low-risk, high-reward introduction to the mechanics of creating musical notes, acting as a perfect gateway instrument for many young musicians.
Small Hands: Why 4 Strings Are Easier Than 6 for a 6-Year-Old
When parents consider a string instrument, the default choice is often a fractional-size guitar. While smaller, these instruments still present two significant ergonomic hurdles for young children: the number of strings and the string tension. This is where a four-string instrument like the ukulele offers a distinct advantage for a child’s small hands and developing finger strength.
The most obvious difference is the fretboard. With only four strings to manage, a child can more easily form chords without their fingers getting tangled or muting adjacent strings. The neck of a ukulele is also narrower, allowing for a more comfortable and secure grip. Furthermore, a ukulele’s scale is 25% to 50% shorter than a guitar, meaning the frets are closer together. This reduces the amount of stretching required, making it physically easier for a child to reach the notes needed for their first chords.
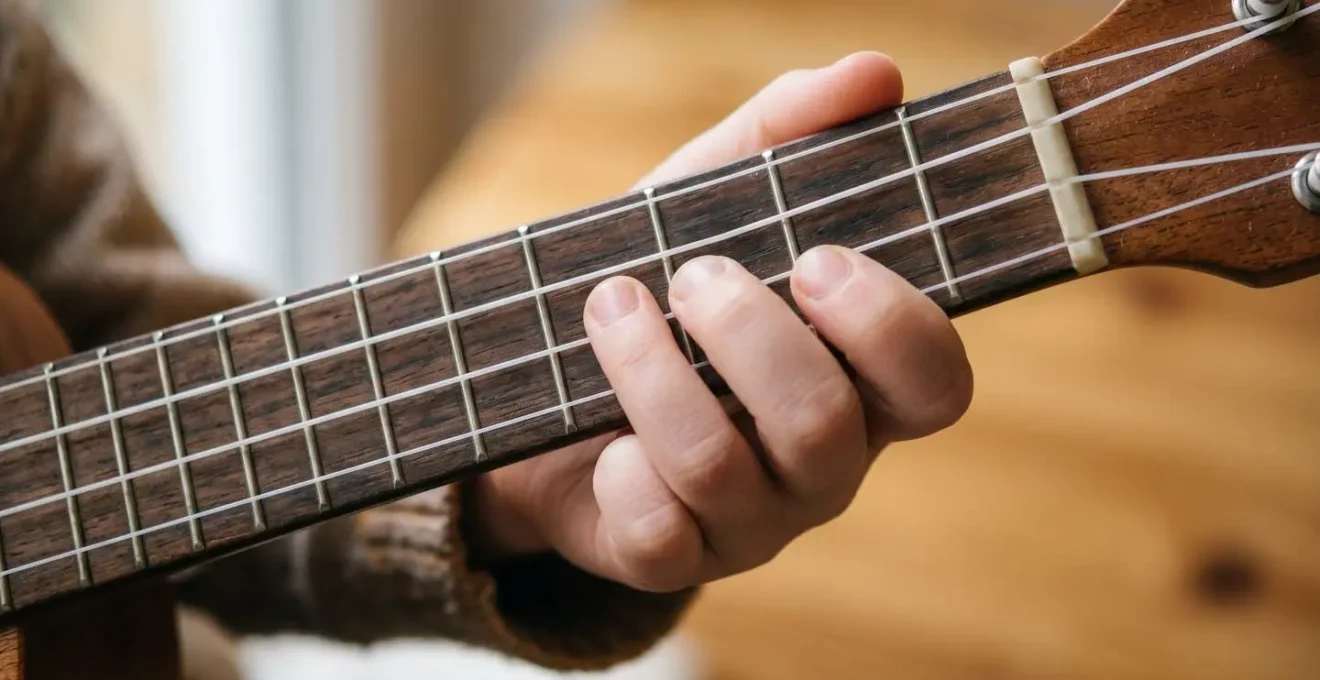
Beyond the number of strings, the material is a critical factor. Guitars use steel strings, which require significant finger pressure and can be painful for beginners. Ukuleles use nylon strings, which are softer and require far less force to press down. This single difference dramatically reduces the initial discomfort that causes so many young guitarists to give up.
Case Study: Nylon String Tension vs. Steel
A study comparing ukuleles and guitars for children found that the lower tension of nylon strings is a game-changer. It revealed that children aged 5-7 using soprano ukuleles had 40% longer practice sessions compared to those on fractional guitars, largely due to reduced physical fatigue and finger pain. The study emphasized that low string tension makes the instrument more inviting and less of a physical battle for a young learner, directly impacting their willingness to practice.
For a young child, the ukulele isn’t a « toy guitar »; it’s a properly scaled instrument that sets them up for success by prioritizing comfort and immediate playability.
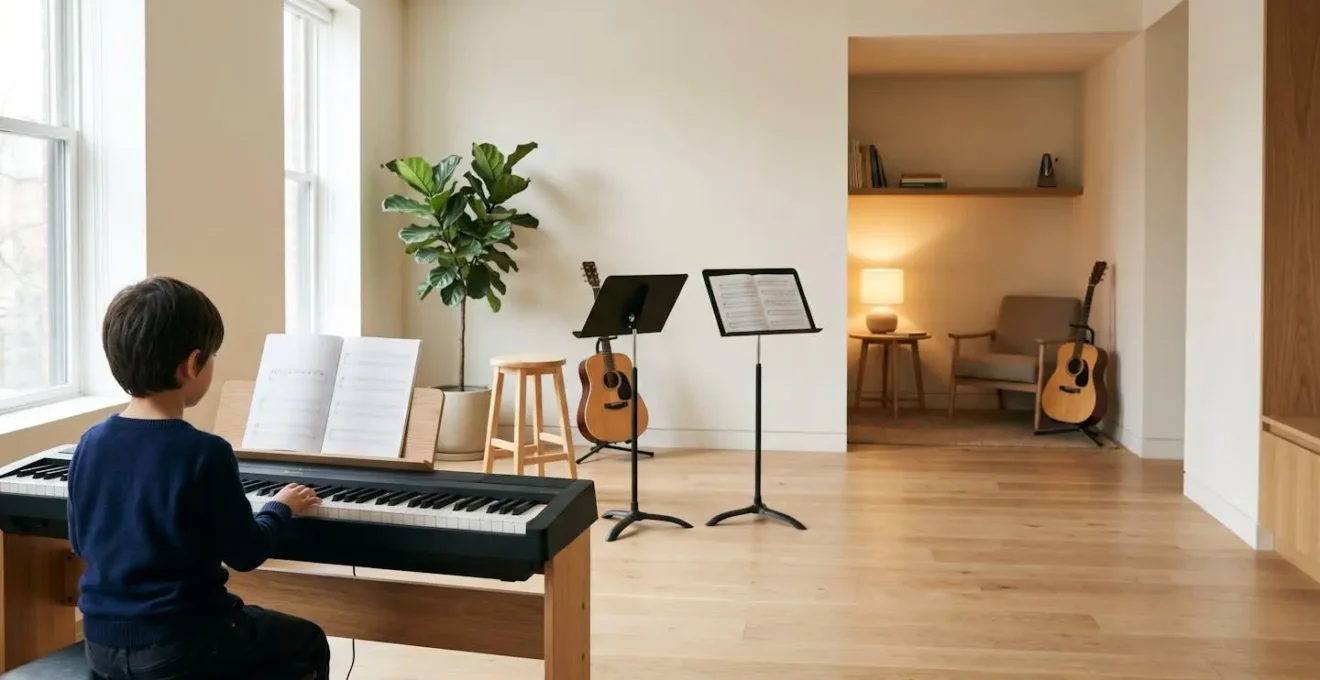
Weighted Keys: Does It Matter for a Beginner?
The piano is often called the king of instruments for its ability to teach both melody and harmony, providing a strong theoretical foundation. When choosing a digital piano or keyboard, parents are immediately confronted with a key decision: weighted, semi-weighted, or non-weighted (synth-action) keys. For a young beginner, especially those under the age of 7, this choice is crucial for their physical comfort and engagement.
Fully weighted keys are designed to replicate the feel of an acoustic piano, where a hammer mechanism creates resistance. This is essential for developing proper classical technique, finger strength, and dynamic control (playing loud and soft). However, for a small child, this resistance can be a significant physical barrier. It requires strength they haven’t yet developed, which can lead to fatigue and a feeling that playing is « hard work. » As Music Education Experts note in their guide, this can be a real issue. They state:
Children can find it challenging to navigate fully-weighted piano keys, so they should start on semi-weighted or synth-like keys.
– Music Education Experts, Best Keyboards for Beginners Guide
Non-weighted or « synth-action » keys, on the other hand, are light and springy, requiring very little pressure to produce a sound. This allows a young child to explore the keyboard, learn note names, and play melodies without fighting the instrument. This low physical barrier is also ideal for integration with popular learning apps, which often rely on quick, game-like responses that are easier on synth-action keys. While this doesn’t build « proper » piano touch, it prioritizes exploration and fun—a key motivator for a young learner.
The following table, based on an analysis from MusicRadar, breaks down the key differences to help you align the keyboard type with your child’s needs and your budget.
| Feature | Weighted Keys | Non-Weighted/Synth Action |
|---|---|---|
| Best For | Classical training, acoustic piano transition | Electronic music, app-based learning, younger children |
| Physical Demand | Requires finger strength development | Light touch, less fatigue for small hands |
| Technique Building | Develops proper piano touch and dynamics | Encourages exploration without physical barriers |
| Age Suitability | Ages 7+ recommended | Ages 4+ suitable |
| Learning Apps | Limited gamified integration | Seamless integration with apps like Simply Piano |
| Cost Range | $300-$600 entry level | $100-$300 entry level |
For a child under seven, a 61-key non-weighted keyboard is often a more practical and encouraging start. They can always graduate to a weighted-key instrument later, once their interest is confirmed and their hands have grown stronger.
Why Starting with Drums Builds a Solid Rhythmic Foundation
Drums and percussion are often the last instruments parents consider, usually due to one major concern: the noise. Yet, rhythm is the heartbeat of all music, and starting with a percussion instrument can build a rock-solid internal clock that benefits a child no matter what instrument they eventually pursue. The physical, full-body engagement of drumming is also a fantastic outlet for energetic kids.
The appeal is undeniable for children. In fact, a Royal Philharmonic Orchestra survey found that 35% of children aged 6-16 selected drums or percussion as their instrument of interest, making it one of the most popular choices. The good news for parents is that the « noise problem » is largely a solved one. Modern technology and clever acoustic solutions make it entirely possible to have a budding drummer in an apartment without disturbing the neighbors.
The key is to explore options beyond a full acoustic kit. Electronic drum kits with headphones offer the full experience—multiple drums, cymbals, and pedals—with a volume knob. For a more budget-friendly and space-saving approach, simple practice pads provide a realistic rebound for learning stick technique in near silence. Even acoustic options like a cajon (a box drum) or bongos can provide a rich rhythmic experience at a much lower volume than a traditional drum set.
Your Guide to Silent Drumming Solutions
- Practice pads: Affordable rubber pads (under $50) with realistic rebound that allow full technique development in near silence.
- Electronic drum kits with headphones: Full kit experience with volume control, starting around $200-$400 for beginner models.
- Cajon drum: An all-in-one box drum producing bass and snare sounds that is naturally quieter than a full kit, portable, and space-efficient.
- Bongos or hand drums: Develop rhythm and coordination without pedals, suitable for younger children (ages 4-6), with minimal noise compared to sticks on drums.
Instead of viewing drums as a noisy nuisance, parents can see them as a powerful tool for developing the most fundamental skill in music: a great sense of time.
Growing Kids: Why Renting a Violin Is Smarter Than Buying
For orchestral instruments like the violin, cello, or flute, the temptation to buy a cheap online starter pack is immense. However, this is where parents are most likely to fall into the « Violin-Shaped Object » (VSO) trap. These mass-produced items look like instruments but are often so poorly made that they are physically unplayable, leading to immense frustration for the child.
Renting from a reputable local music store or a school program is almost always the smarter, safer, and ultimately more budget-conscious choice for three key reasons: quality, maintenance, and size-swapping. Rental instruments are typically durable, reliable models from respected brands that are professionally set up by a luthier before they go out. This means the bridge is correctly placed, the pegs hold their tuning, and the action is playable from day one—something that is almost never true of a sub-$100 online instrument.
The VSO Trap: Why Ultra-Cheap Violins Lead to Quitting
Music educators have identified a critical problem with instruments sold online for under $100. A study of 200 beginner violin students found that those who started on these « Violin-Shaped Objects » had a staggering 65% quit rate within just 6 months. This was compared to a mere 15% for students using quality rental instruments. The VSOs suffered from warped fingerboards and poorly fitted bridges that made correct intonation impossible, creating frustration that parents often misinterpreted as their child’s lack of talent or interest.
Furthermore, children grow. A student starting on violin at age 6 will need a 1/8 size, then a 1/4, a 1/2, and a 3/4 before finally reaching a full-size instrument. A rental program allows you to swap sizes for free as your child grows. Buying each of these fractional sizes would be prohibitively expensive. Rental programs also include maintenance and insurance, covering broken strings or accidental damage that would otherwise lead to costly repairs.
What Rental Programs Include That Purchases Don’t
- Maintenance and repairs: Professional luthier setup, string replacement, and minor repairs are included at no extra cost.
- Size exchanges: Free instrument swaps as your child grows through fractional sizes (e.g., 1/8, 1/4, 1/2 violin).
- Damage insurance: Protects against accidental breaks or wear without unexpected expenses.
- Equity programs: Many programs apply a portion of your monthly rental payments toward the eventual purchase of the instrument if the commitment continues.
- Quality guarantee: Rental instruments are professionally maintained to be playable and reliable from day one.
Renting isn’t « throwing money away »—it’s an affordable investment in a quality tool and a flexible path that adapts to your child’s growth and commitment level.
Which Method Fits Your Child’s Personality Best?
Choosing the right physical instrument is only half the battle. The other half is choosing the right learning method. A structured, sight-reading-focused approach that works wonders for one child might completely disengage another who thrives on creativity and improvisation. Aligning the teaching style with your child’s innate personality can be the difference between a lifelong passion and a short-lived hobby.
There are several broad archetypes of learners, and identifying which one best describes your child can help you find the right teacher and environment. Does your child love building with LEGOs and following instructions? A traditional method with a clear, structured curriculum might be perfect. Are they a social butterfly who loves being part of a team? A group class or school band could provide the motivation they need. Or do they constantly make up their own songs and stories? A teacher who uses a play-by-ear or creative approach like the Suzuki method might be a better fit.
Private lessons offer personalized pacing, which is ideal for a focused child who prefers one-on-one attention, while group classes provide peer motivation for more extroverted learners. There is no single « best » method, only the best method for your child. The following table, adapted from music education resources, provides a framework for matching learner types with teaching styles.
This comparative analysis, drawn from insights on how to choose instruments based on personality, helps clarify the options.
| Learner Archetype | Characteristics | Best Learning Method | Ideal Instruments |
|---|---|---|---|
| The Builder | Loves structure, rules, systems, enjoys LEGO-type activities | Traditional sight-reading, structured curriculum | Piano, recorder, clarinet |
| The Social Explorer | Thrives in teams, motivated by peers, extroverted | Group classes, school band/orchestra | Band/orchestra instruments, guitar ensembles |
| The Spontaneous Creator | Makes up songs, improvises, dislikes rigid structure | Aural methods (Suzuki), play-by-ear approach | Ukulele, drums, piano with creative teacher |
| The Focused Introvert | Prefers one-on-one attention, deep concentration | Private lessons with personalized pacing | Violin, piano, flute |
Before you even book a lesson, have a conversation with potential teachers about their philosophy. A teacher who is willing to adapt their approach to your child’s needs is an invaluable partner in their musical journey.
High vs Low Action: Finding the Sweet Spot for Playability and Tone
For string instruments like guitars and ukuleles, there is a single technical specification that has more impact on a beginner’s experience than any other: the « action. » The action is simply the height of the strings off the fretboard. If the action is too high, it requires a huge amount of finger pressure to press the string down, causing pain and making chords nearly impossible. If it’s too low, the strings will buzz against the frets. Finding the sweet spot is critical.
Unfortunately, most budget-friendly instruments come from the factory with the action set very high. This is the primary reason why a $99 guitar can feel unplayable. The good news is that the action is adjustable. A professional « setup » from a guitar technician or luthier, which typically costs $50-$75, can transform a difficult instrument into a comfortable, playable one. This is the single most valuable investment you can make in a starter string instrument.
As Guitar Education Specialists explain, the concept is simple when you use an analogy:
Action on a guitar is like tire pressure on a bike. Low action is fast and effortless on a smooth path but can buzz. High action requires more effort but can handle anything without buzzing. A beginner needs the road bike setup.
– Guitar Education Specialists, Ukulele vs Guitar for Kids Guide
As a parent in a music store, you can perform a quick check to gauge an instrument’s playability right out of the box. This simple test can save you and your child a lot of frustration.
Your 5-Step Playability Audit: The First Fret Squeeze Test
- The Squeeze Test: In the music store, ask your child to press one string down at the first fret (the one closest to the tuning pegs) with their index finger.
- Observe the Effort: Watch their hand and finger. If they need to exert excessive force or their fingertip turns white, the action is likely too high. The string should not leave a deep, painful mark.
- Check the Reach: Can your child comfortably place their index finger on the first fret and their pinky finger on the third fret of the same string without painful straining?
- Ask for Help: If the instrument fails either test, ask the store staff about professional setup services to lower the action. If they can’t help, it’s best to choose a different instrument.
- Prioritize the Setup: Remember, a $50-75 professional setup on a $150 guitar is a far better investment than a $300 guitar with a poor factory setup.
Don’t be swayed by a brand name or a fancy finish; the comfort and playability determined by the action are what will truly make or break your child’s first experience.
Key Takeaways
- Ergonomics First: An instrument’s physical fit—size, weight, and string/key tension—is more important than its price for a young beginner.
- The Danger of « Cheap »: Unplayable « Instrument-Shaped Objects » from online retailers are a primary cause of frustration and quitting. A quality rental is a safer bet.
- Setup is Everything: For string instruments, a professional setup to lower the « action » can turn a difficult budget instrument into a playable one, and is often the best investment you can make.
Understanding the Physics and Maintenance of String Instruments for Better Tone
Once you’ve chosen the right instrument, the journey has just begun. Like any quality tool, a musical instrument requires basic care and maintenance to perform its best. Teaching your child these simple habits not only protects your investment but also fosters a sense of respect and responsibility for their instrument. While some tasks require a professional, many are simple daily or weekly routines that a parent can oversee.
For string instruments, the most basic task is wiping down the strings and fretboard with a dry microfiber cloth after every practice session. This removes oils and residue from fingers that can corrode the strings and deaden the tone over time. Regular tuning is another essential habit. Using a simple clip-on tuner or a smartphone app before each session ensures the child is learning to recognize correct pitches.
However, it’s equally important to know when to call a professional. Tasks like restringing, adjusting the action, or repairing a nut or bridge are best left to a qualified technician or luthier. Trying to perform these adjustments without the proper tools or knowledge can easily cause damage. Understanding this division of labor sets realistic expectations and prevents costly mistakes.
This chart, based on guidance from music academies, provides a clear breakdown of maintenance responsibilities.
| Maintenance Task | Parent Handles | Requires Professional | Frequency |
|---|---|---|---|
| Wiping down strings after playing | ✓ | After each practice session | |
| Basic tuning with app | ✓ | Before each practice | |
| Proper storage (case/stand) | ✓ | Daily | |
| Restringing | ✓ | Every 3-6 months | |
| Action adjustment | ✓ | As needed or annually | |
| Bridge/nut repair | ✓ | As needed | |
| Crack or structural damage | ✓ | Immediately when discovered |
By investing in a playable instrument and teaching the fundamentals of its care, you create an environment where musical curiosity can flourish, free from the physical barriers and frustrations that end so many musical journeys before they even truly begin.